Let’s jump straight to the results. My site work.daolanx.me is hosted on Vercel, but all static assets and images are now served via assets.daolanx.com.
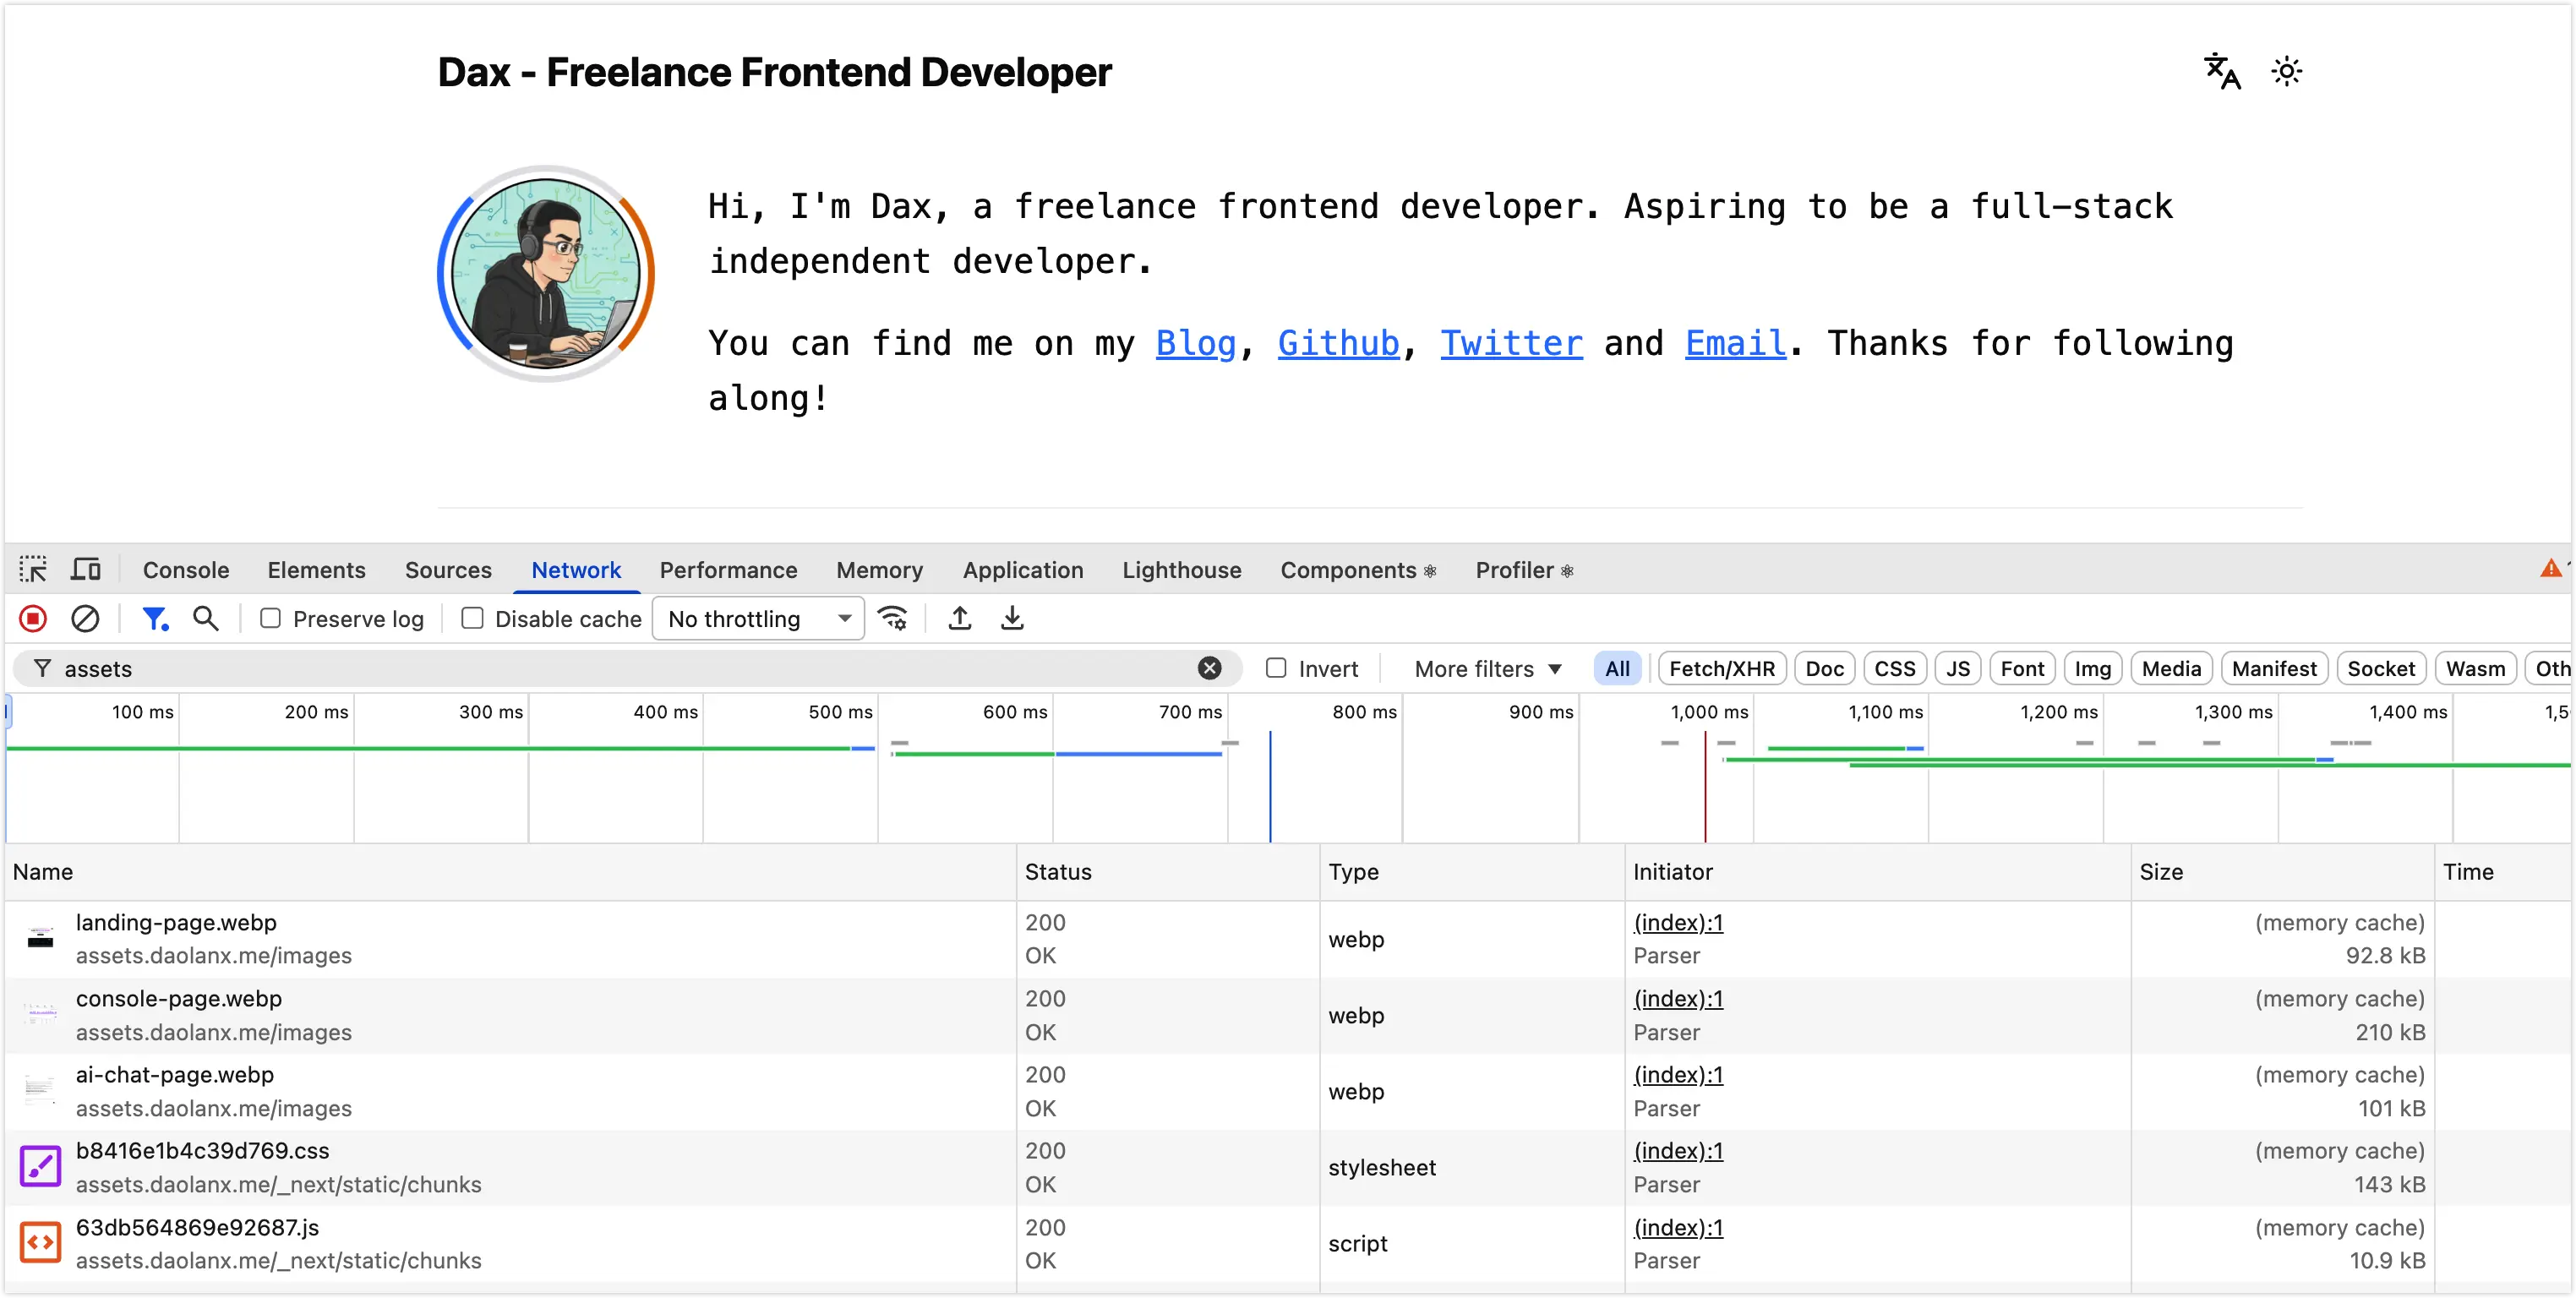
This approach offers several key benefits:
- Superior Performance: While Vercel’s edge network is excellent, Cloudflare operates one of the world’s largest global networks with higher node density and more granular edge configuration options.
- Significant Cost Savings: Serving resources via Cloudflare R2 incurs zero egress fees. In contrast, Vercel’s bandwidth costs can scale rapidly once you exceed the free tier. Offloading static assets drastically reduces Vercel’s bandwidth pressure.
Implementation Concept
Original Workflow
All Build and Deploy processes were handled automatically within the Vercel environment.
Optimized Workflow
- Build via GitHub Workflow: Perform the Next.js production build within the GitHub Actions runner.
- Sync Static Assets: Upload the static portion of the build output (
.vercel/output/static) to Cloudflare R2. - Ship Build Artifacts: Send the pre-compiled artifacts to Vercel.
- Prebuilt Deployment: Vercel receives the artifacts and deploys them instantly without re-running the build process.
Step-by-Step Guide
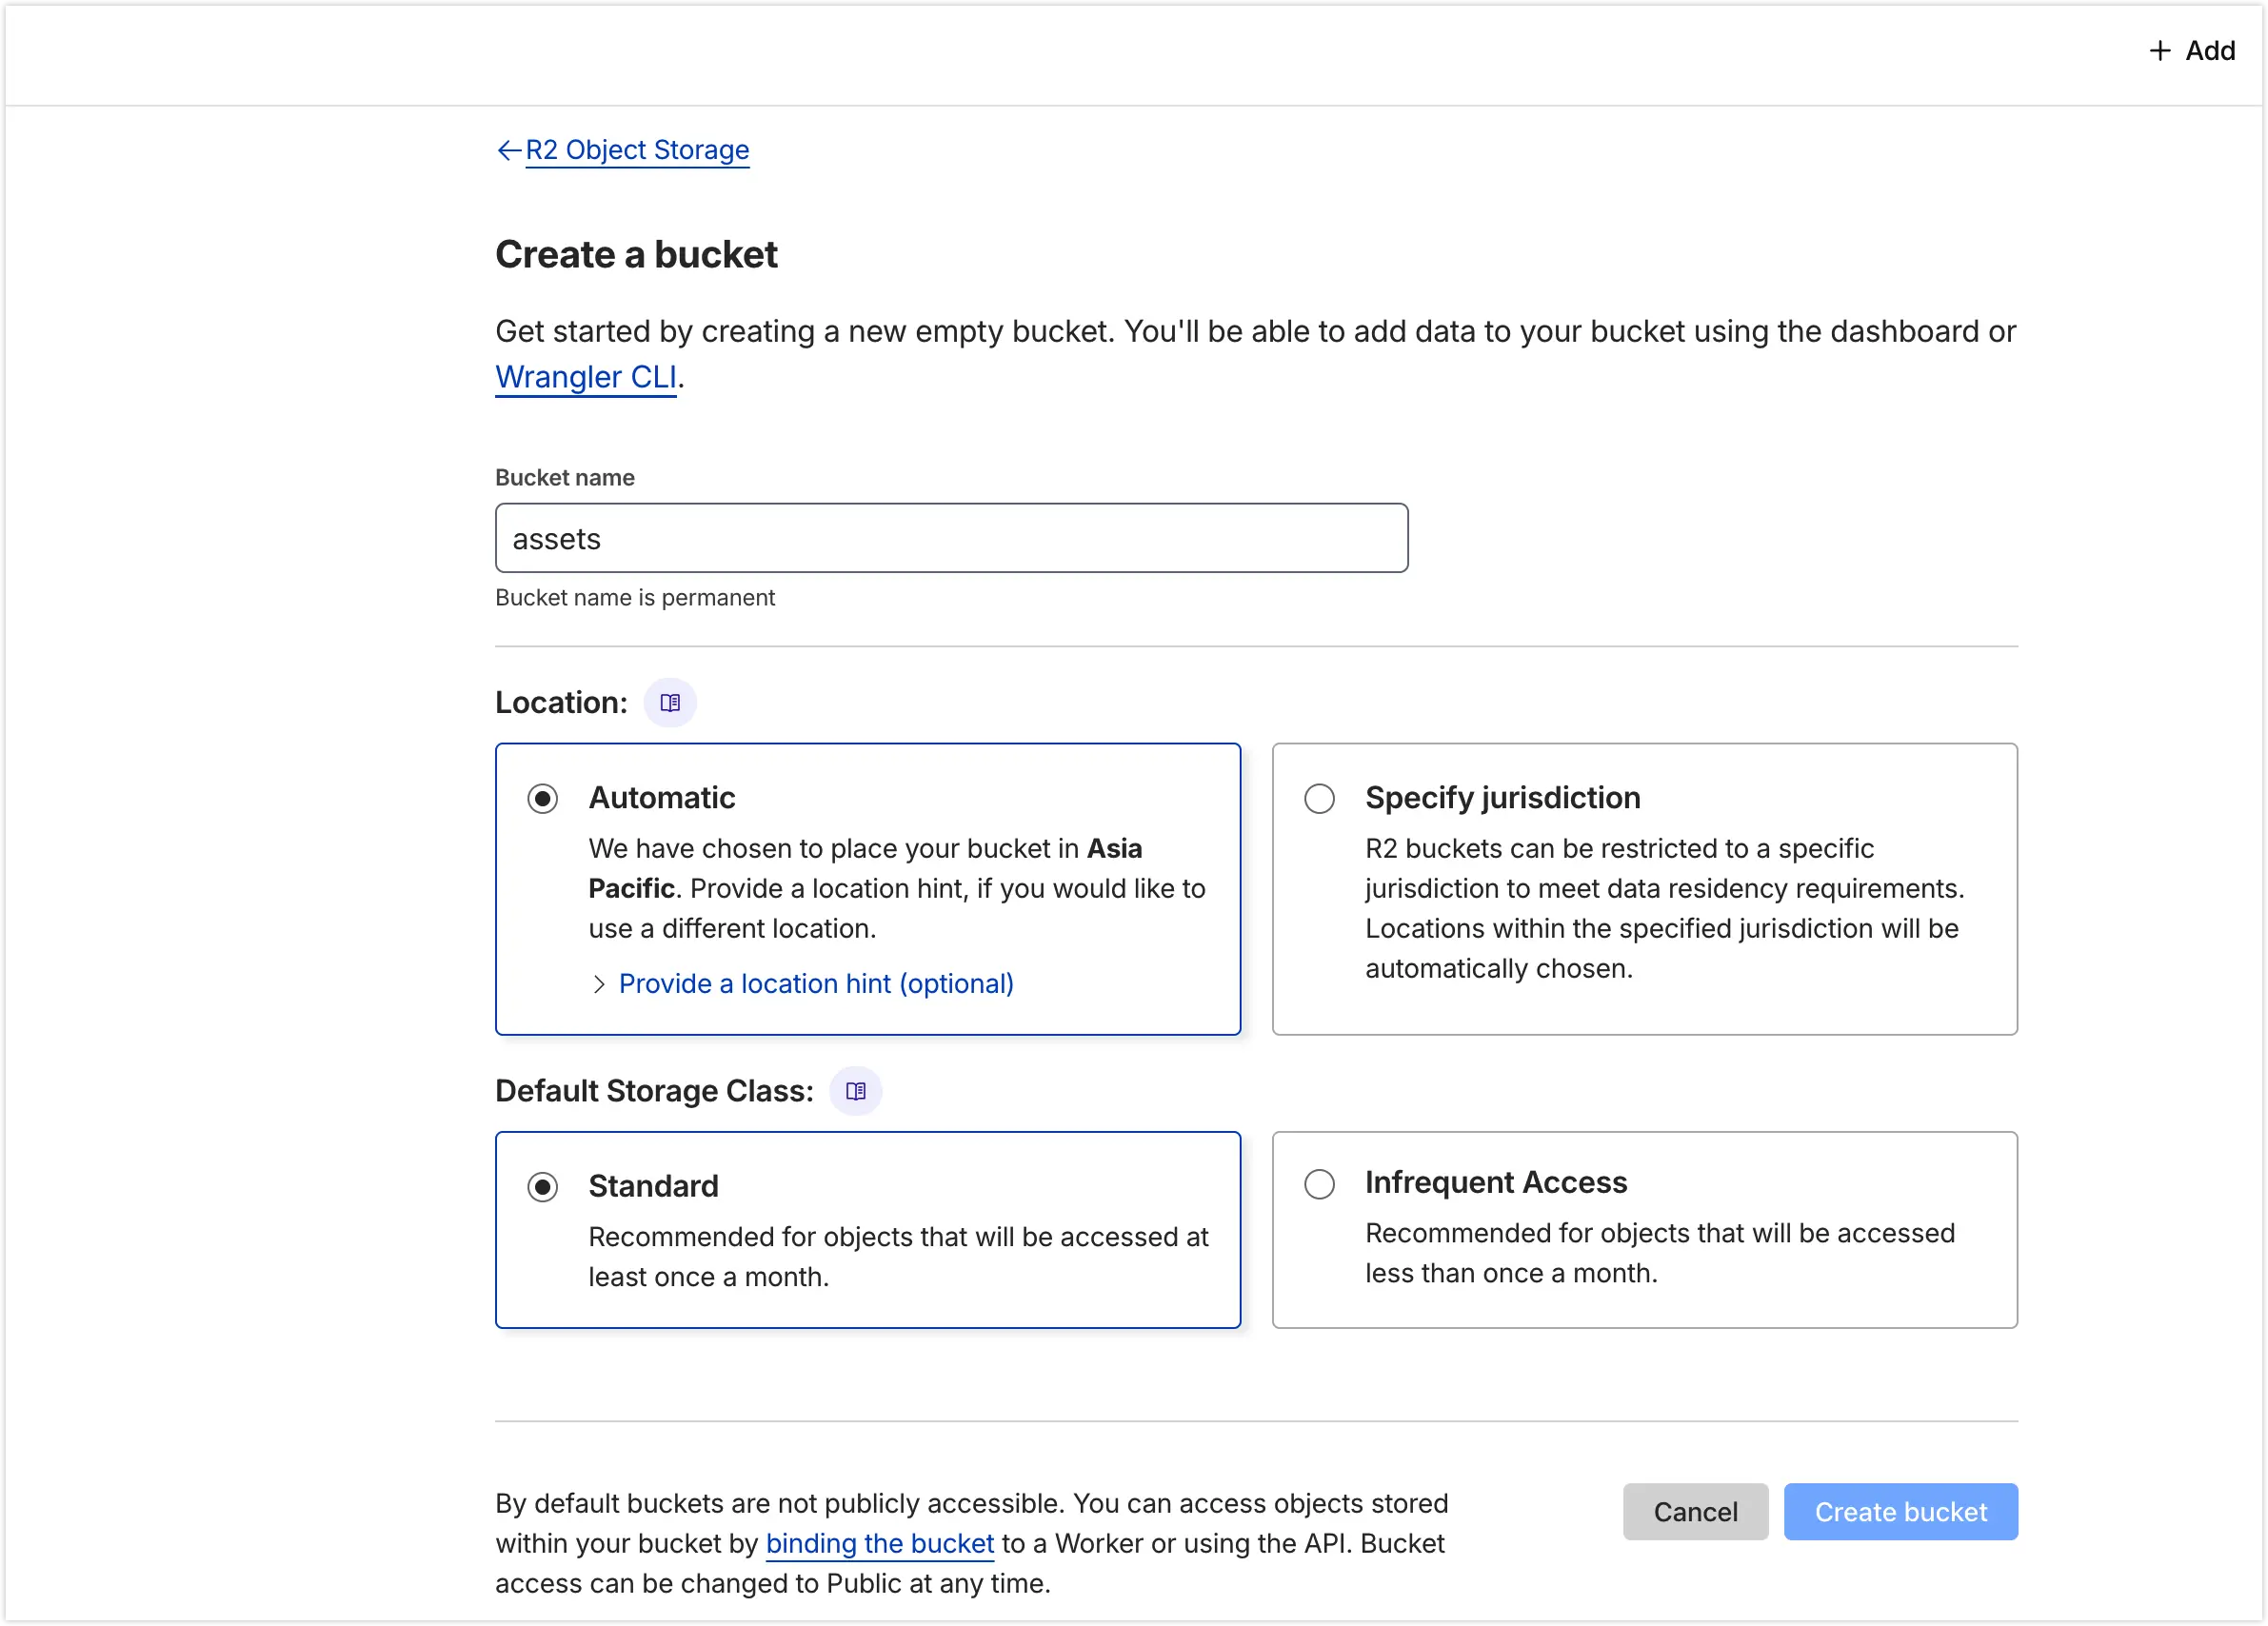
1. Create a Bucket on Cloudflare R2
Create a bucket in Cloudflare R2, using assets as the bucket name for this example.
Navigate to the Settings of the assets bucket and configure Custom Domains to link your specific acceleration domain.
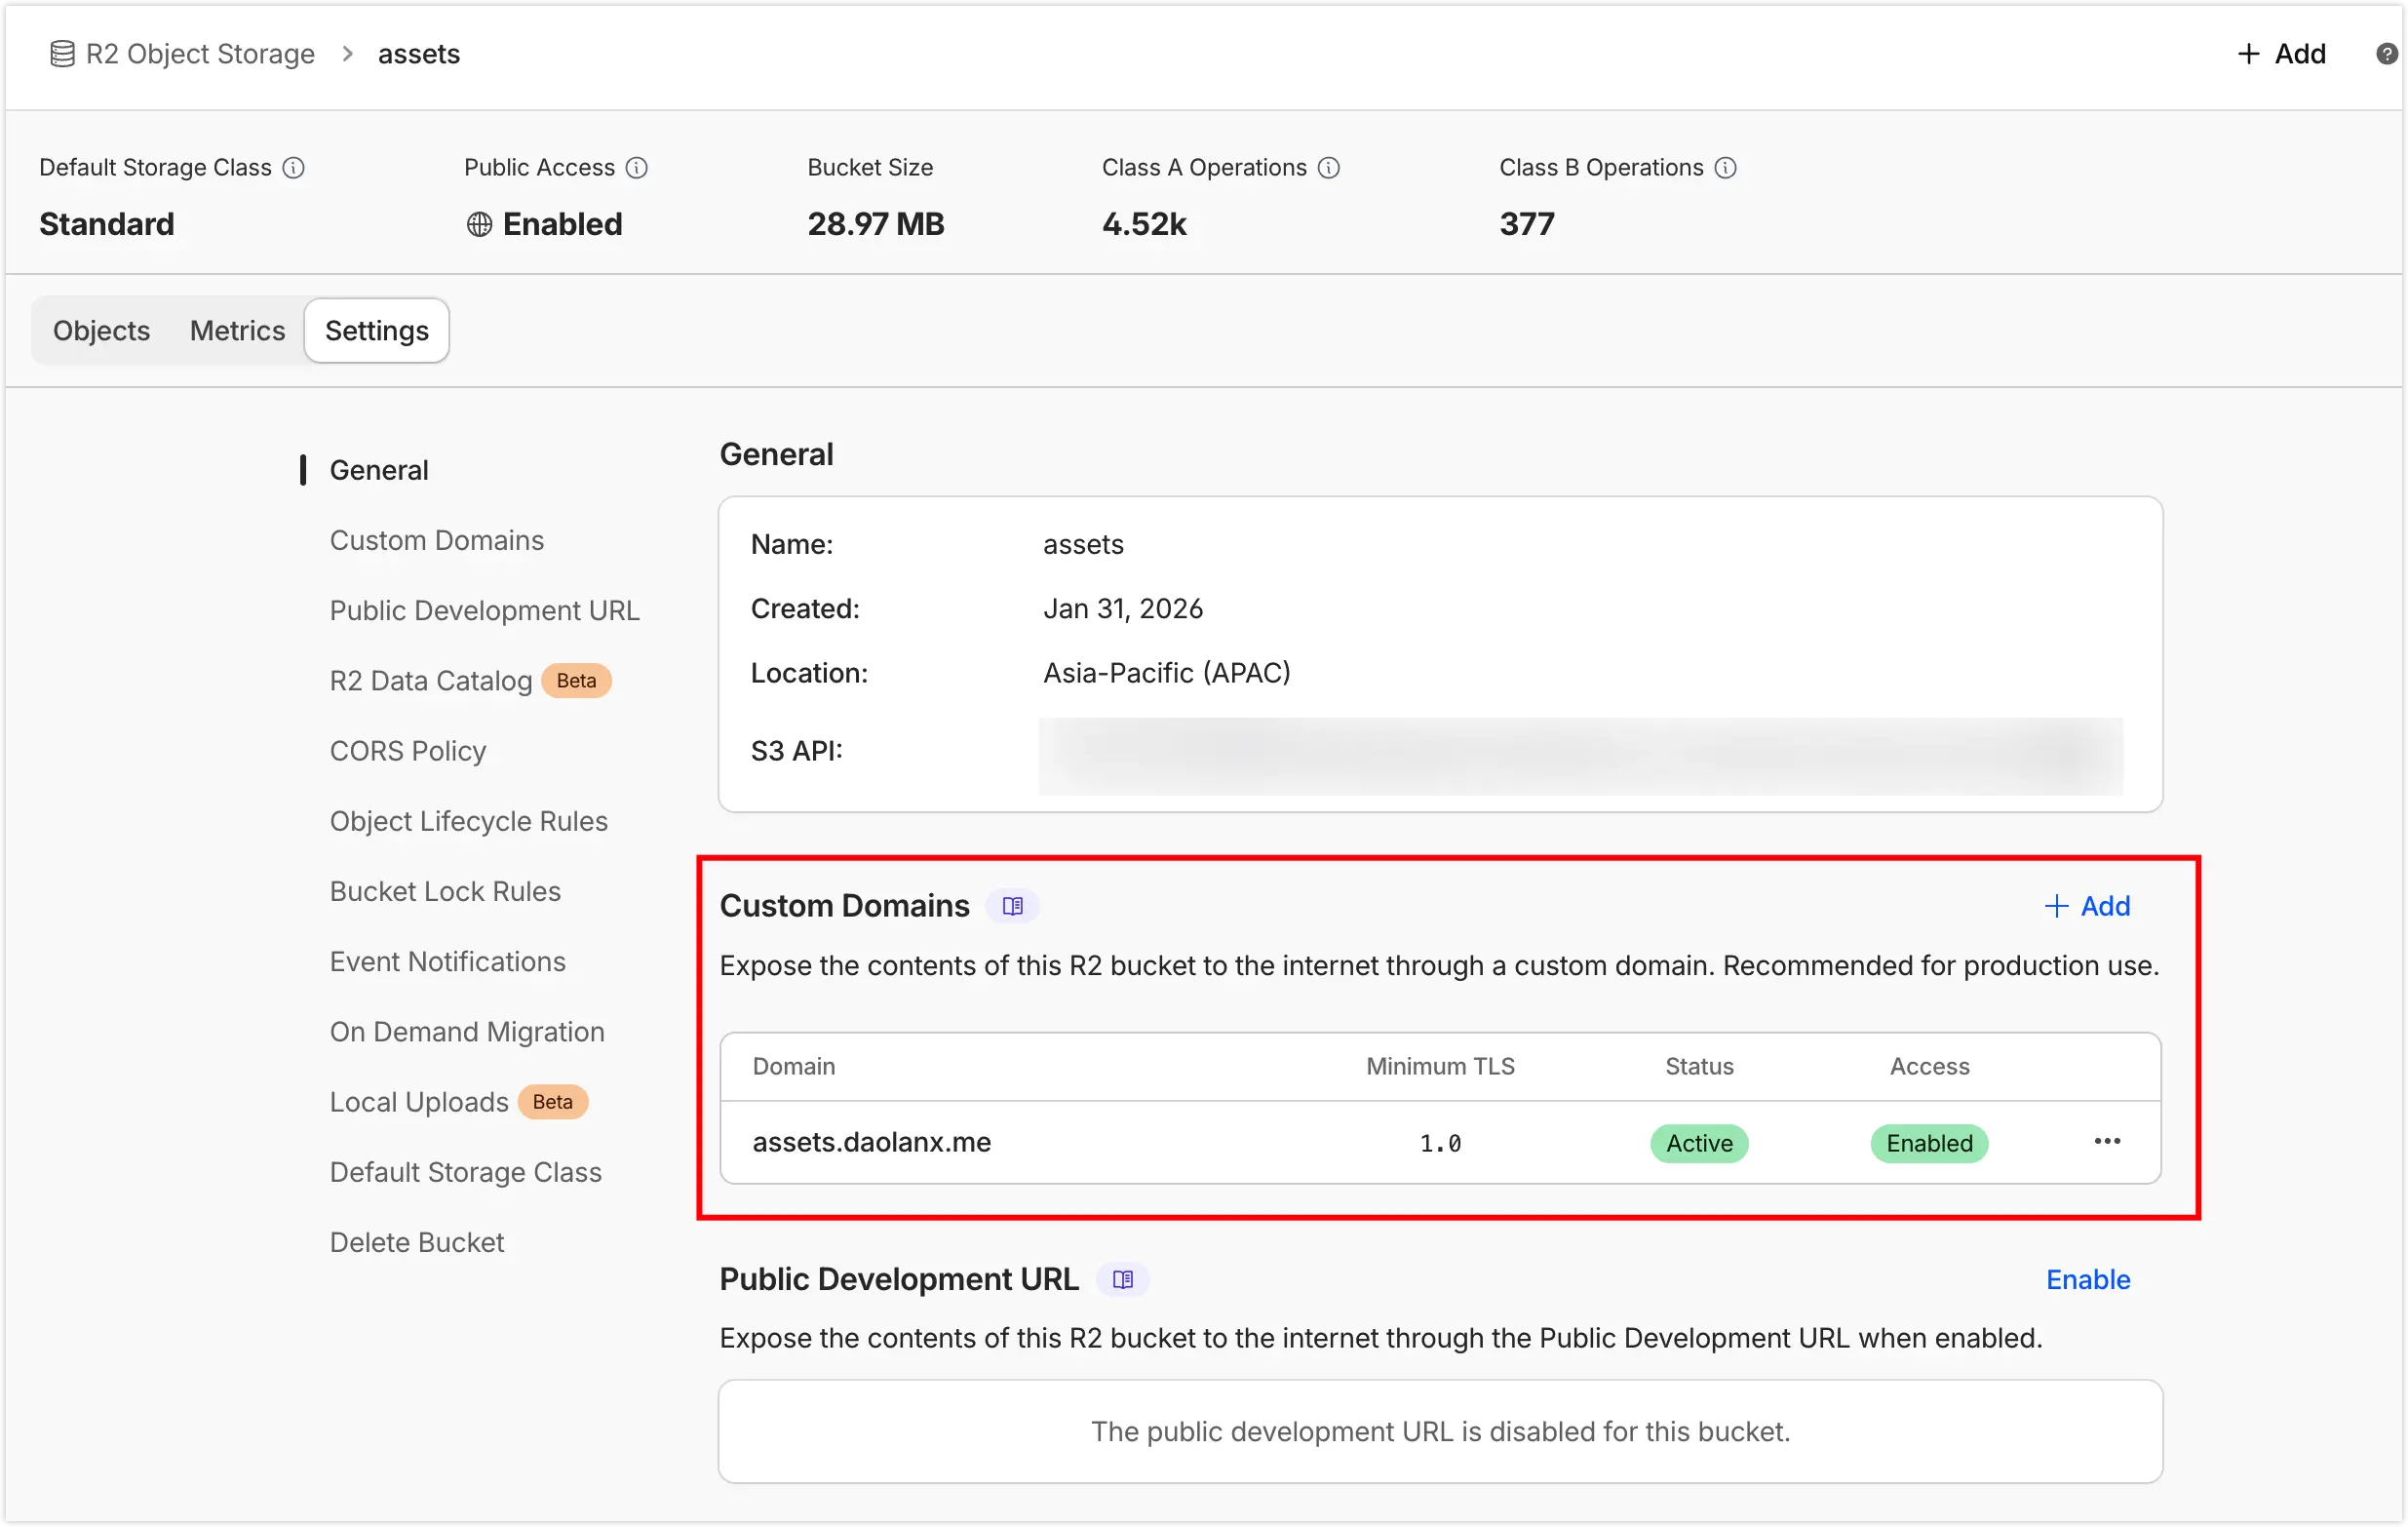
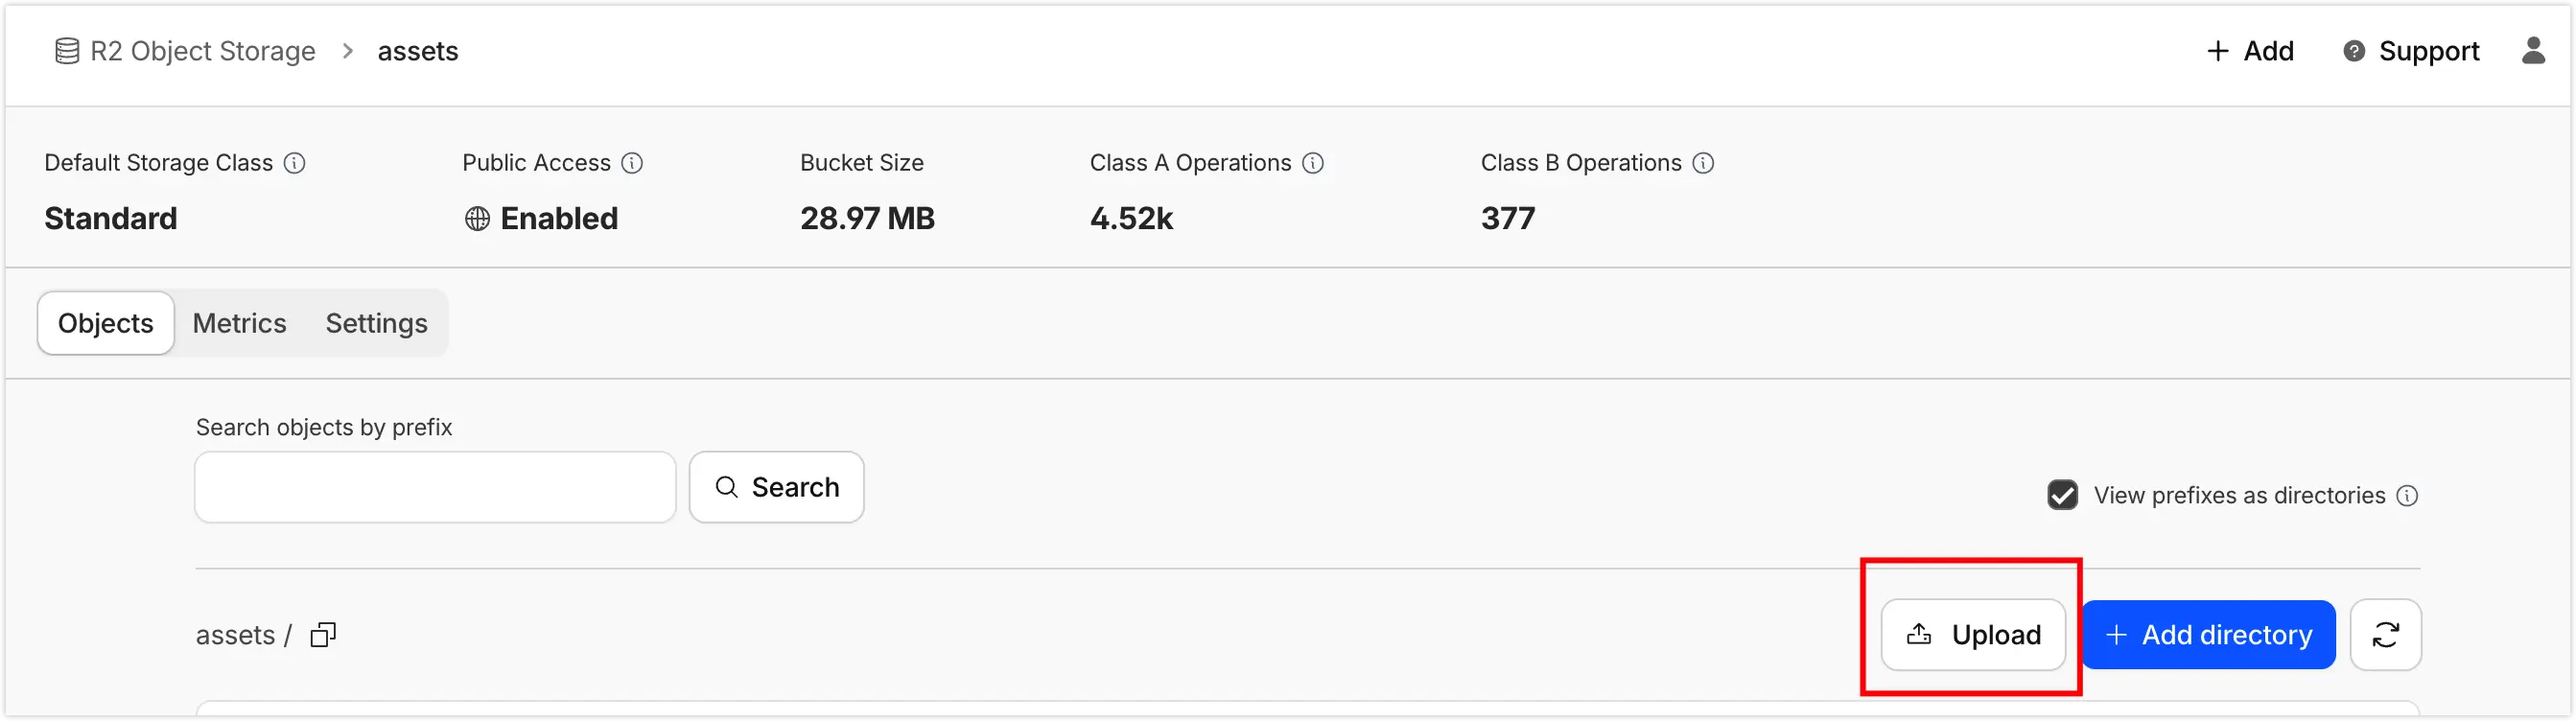
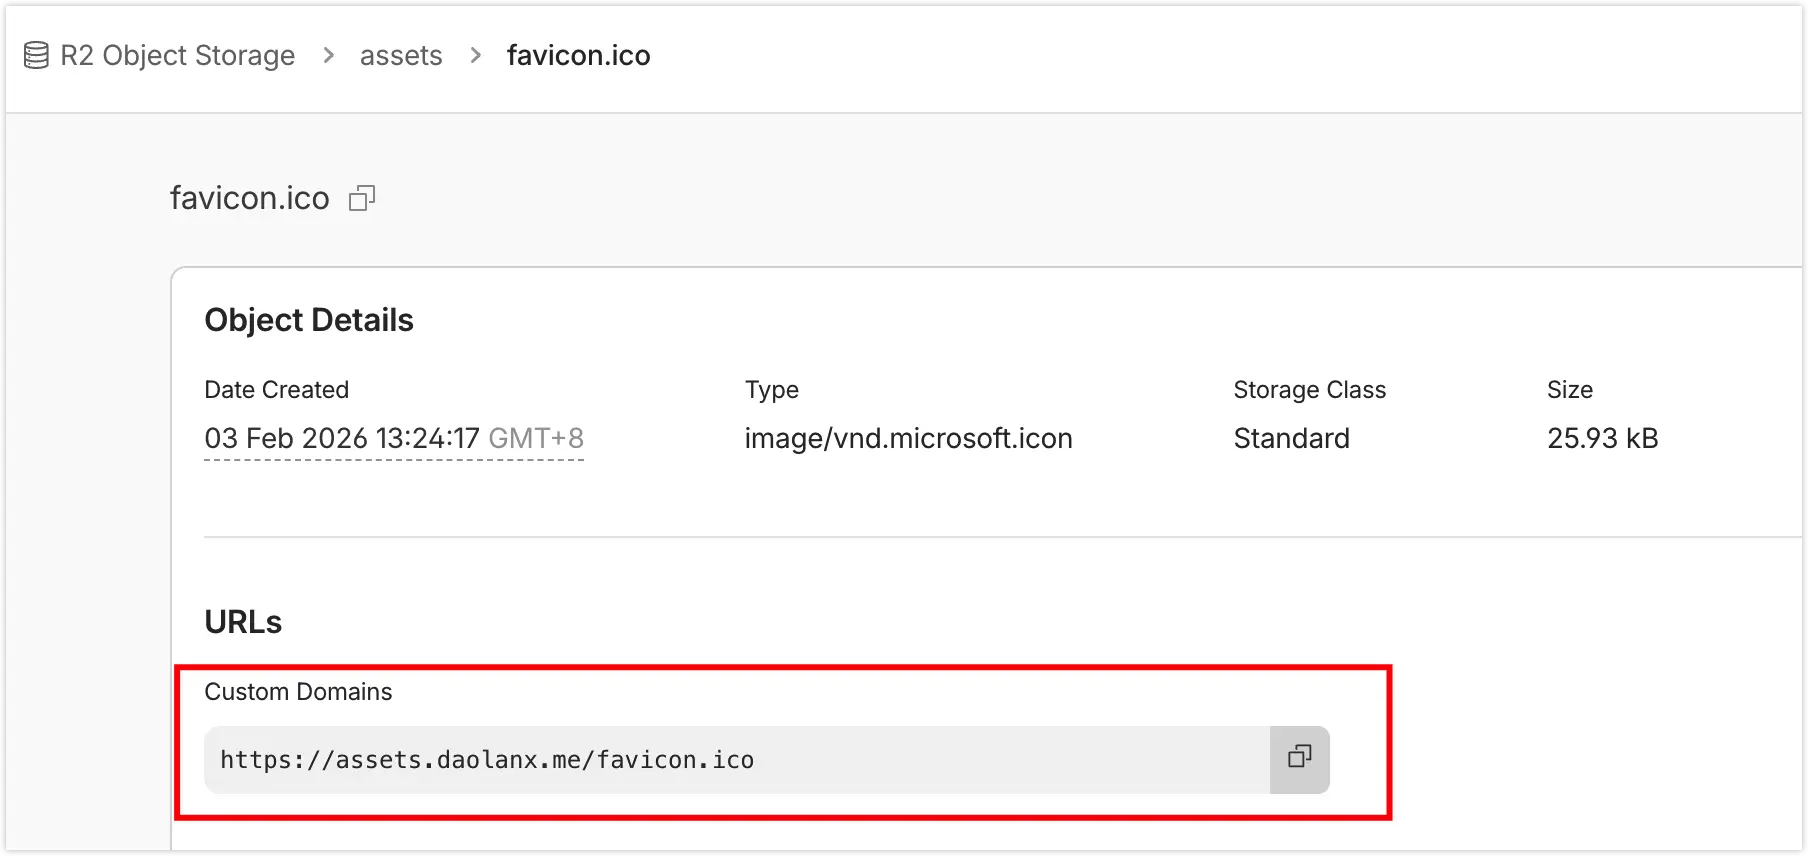
Once configured, I recommend manually uploading a test file to verify it is accessible via your custom domain.
Go to Settings -> CORS Policy in your R2 bucket and add the following configuration
[ { "AllowedOrigins": ["https://www.yourdomain.com", "http://localhost:3000"], "AllowedMethods": ["GET", "HEAD"], "AllowedHeaders": ["*"], "ExposeHeaders": [], "MaxAgeSeconds": 3000 }]2. Configure Next.js App
Modify your next.config.ts file to add the assetPrefix and enable a custom image loader.
import type { NextConfig } from "next"
const isProd = process.env.NODE_ENV === "production"const nextConfig: NextConfig = { // assetPrefix: Routes JS/CSS and other build assets to your CDN assetPrefix: isProd ? "https://your-cdn-domain.com" : undefined,
// Enable custom loader to bypass Vercel's image optimization costs images: { loader: "custom", loaderFile: "./lib/image-loader.ts", },}
export default nextConfigCreate lib/image-loader.ts to prepend the CDN prefix to images in the production environment:
export default function myImageLoader({ src }: { src: string }) { // Keep original path if it's an absolute URL or not in production if (src.startsWith("http") || process.env.NODE_ENV !== "production") { return src } // Append Cloudflare R2 acceleration domain return `https://your-cdn-domain.com${src}`}3. Disable Vercel’s Automatic Git Deployment
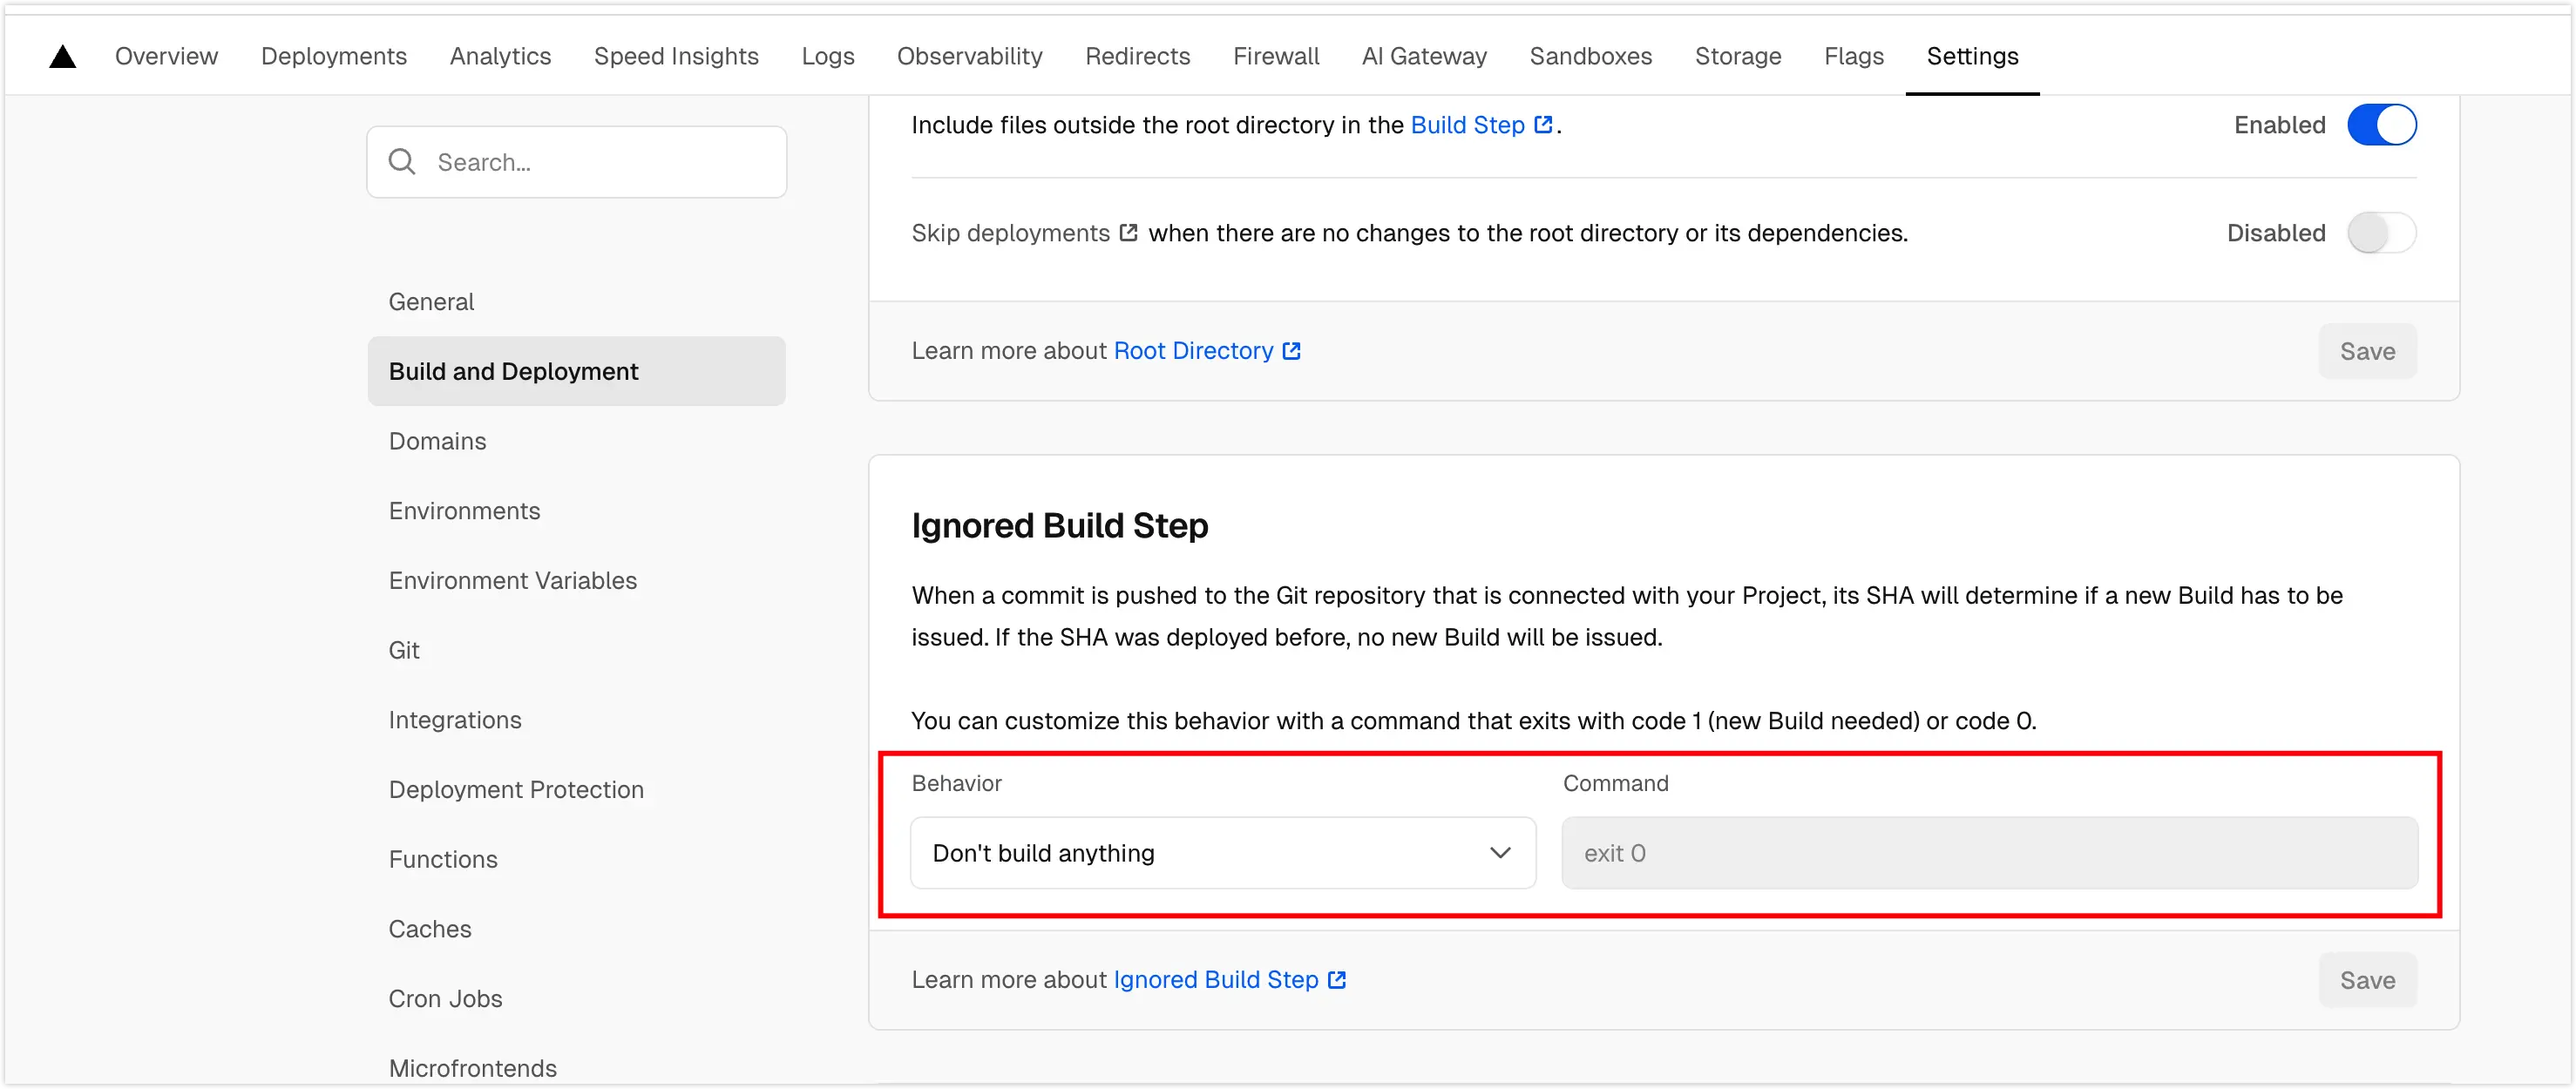
To prevent Vercel from triggering its own build when you push code, we need to disable the automatic pipeline.
In the Vercel project dashboard, go to Settings > Build and Deployment, find the Ignored Build Step section, and select “Don’t build anything”.
4. Configure GitHub Workflow Environment Variables
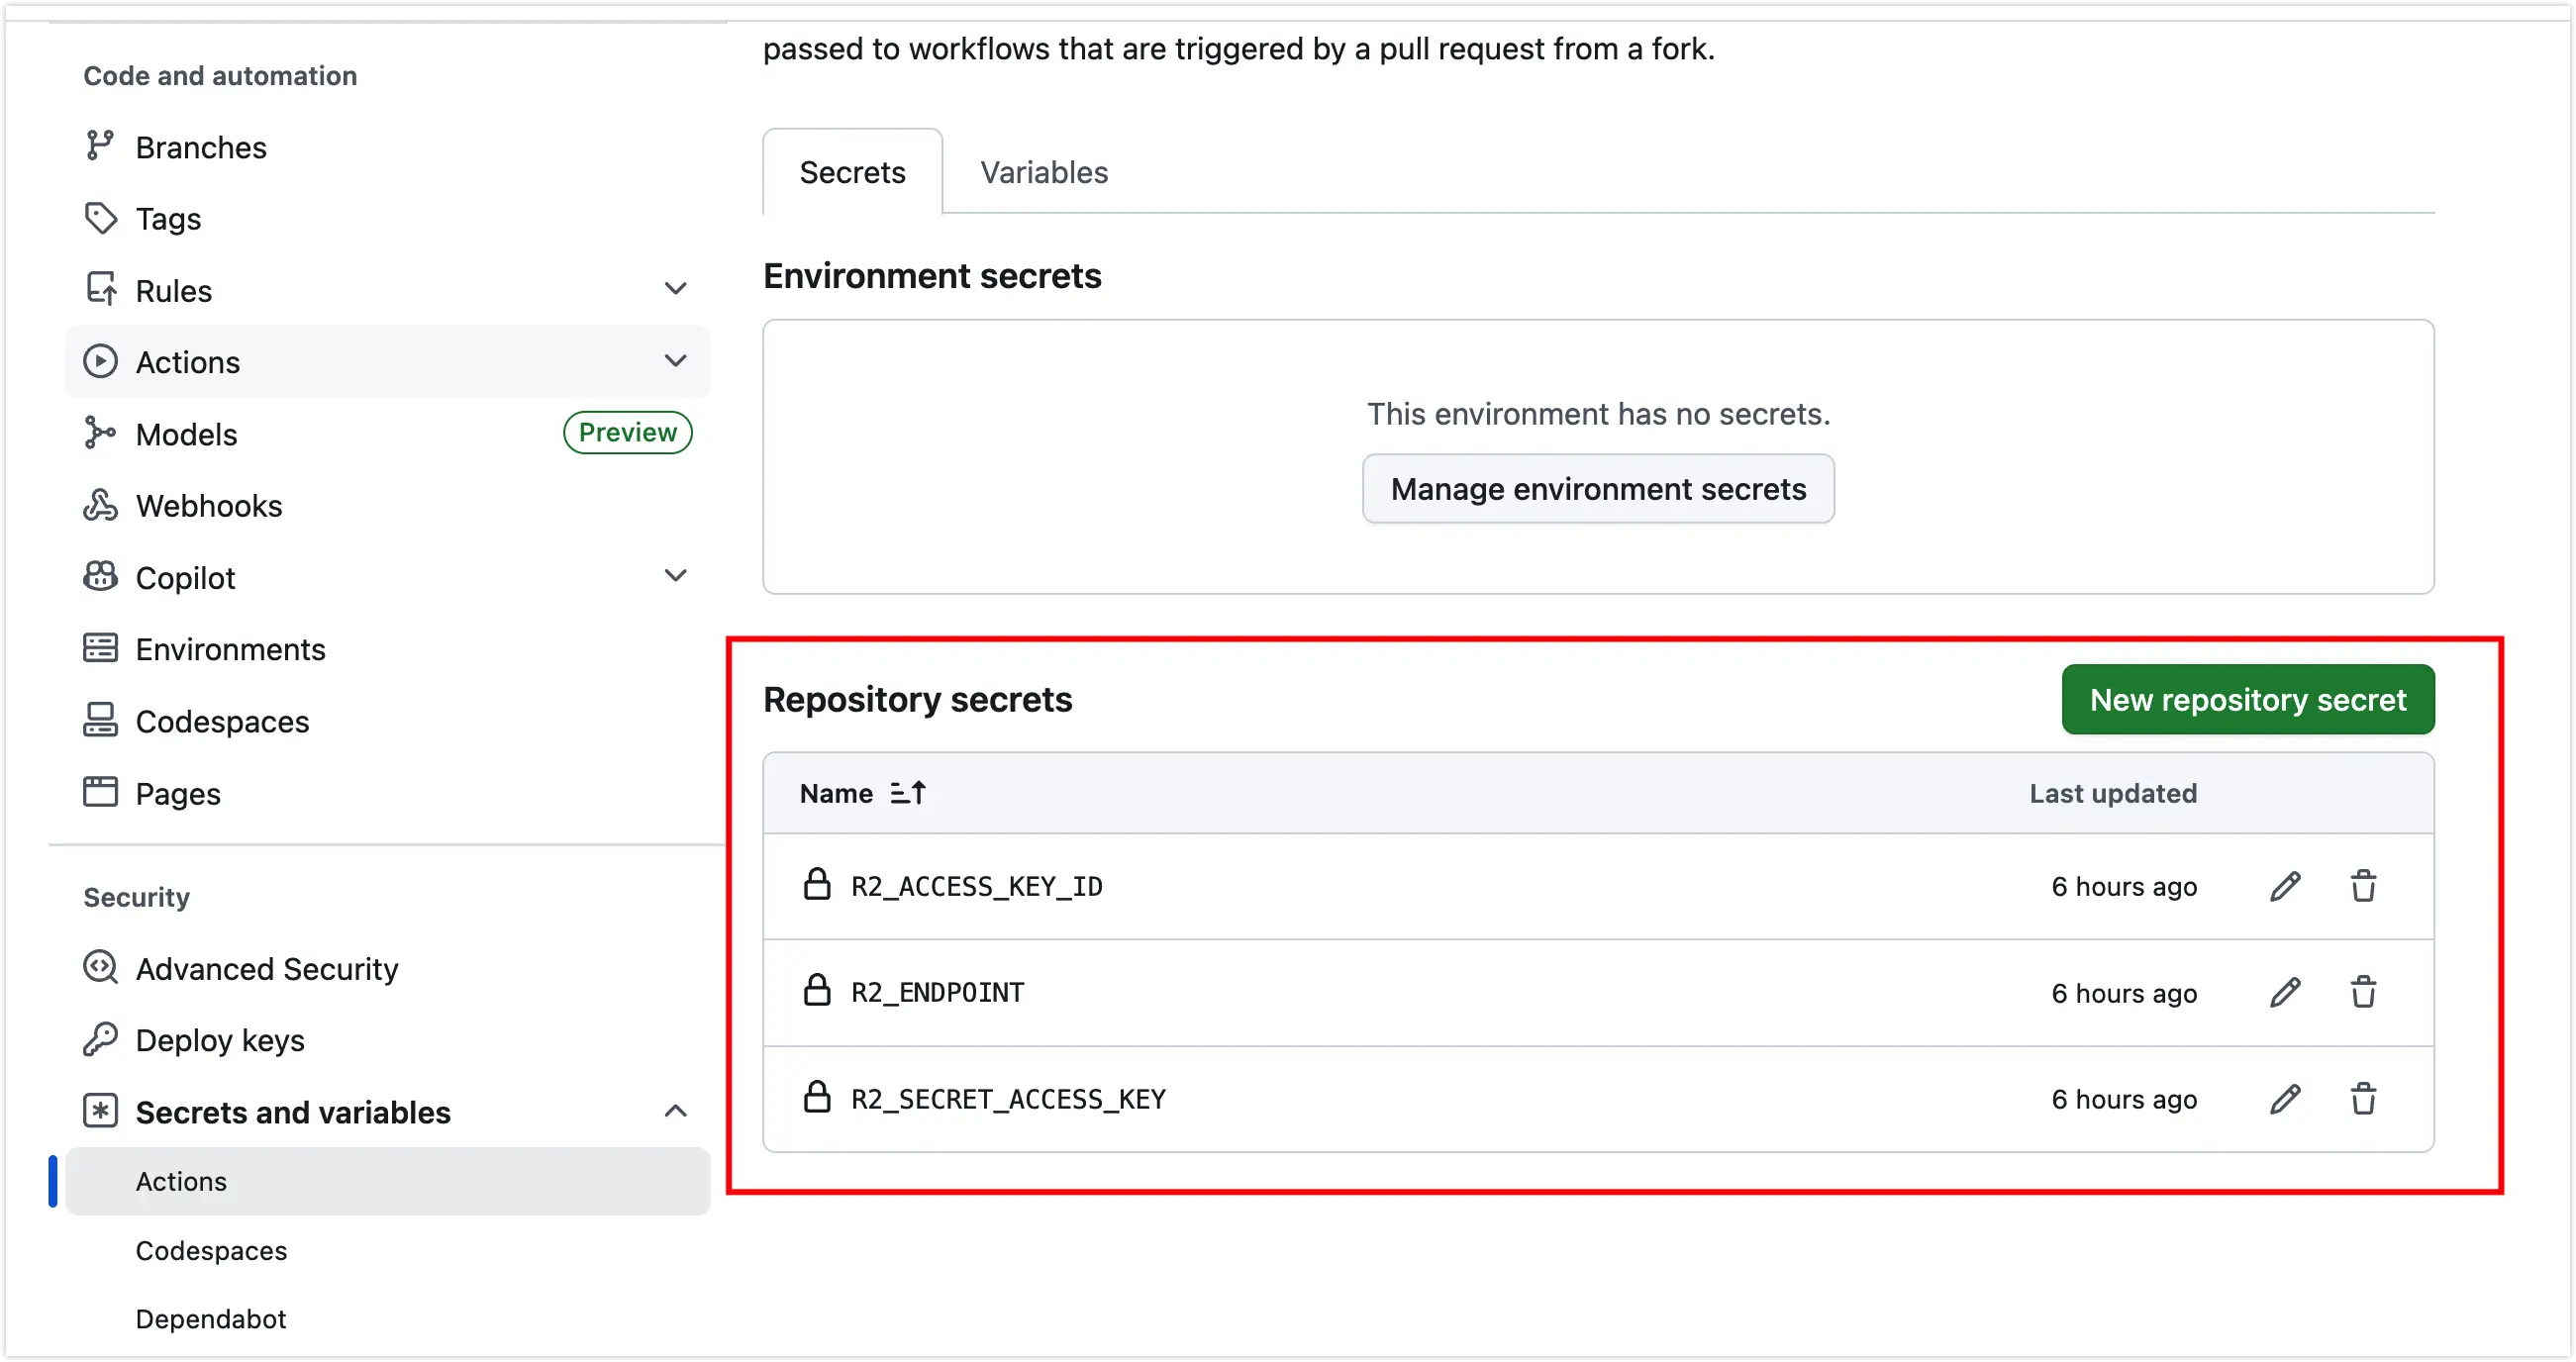
Go to GitHub repository under Settings > Security > Secrets and variables > Actions to set up your keys.
4.1 Set up R2 Secrets
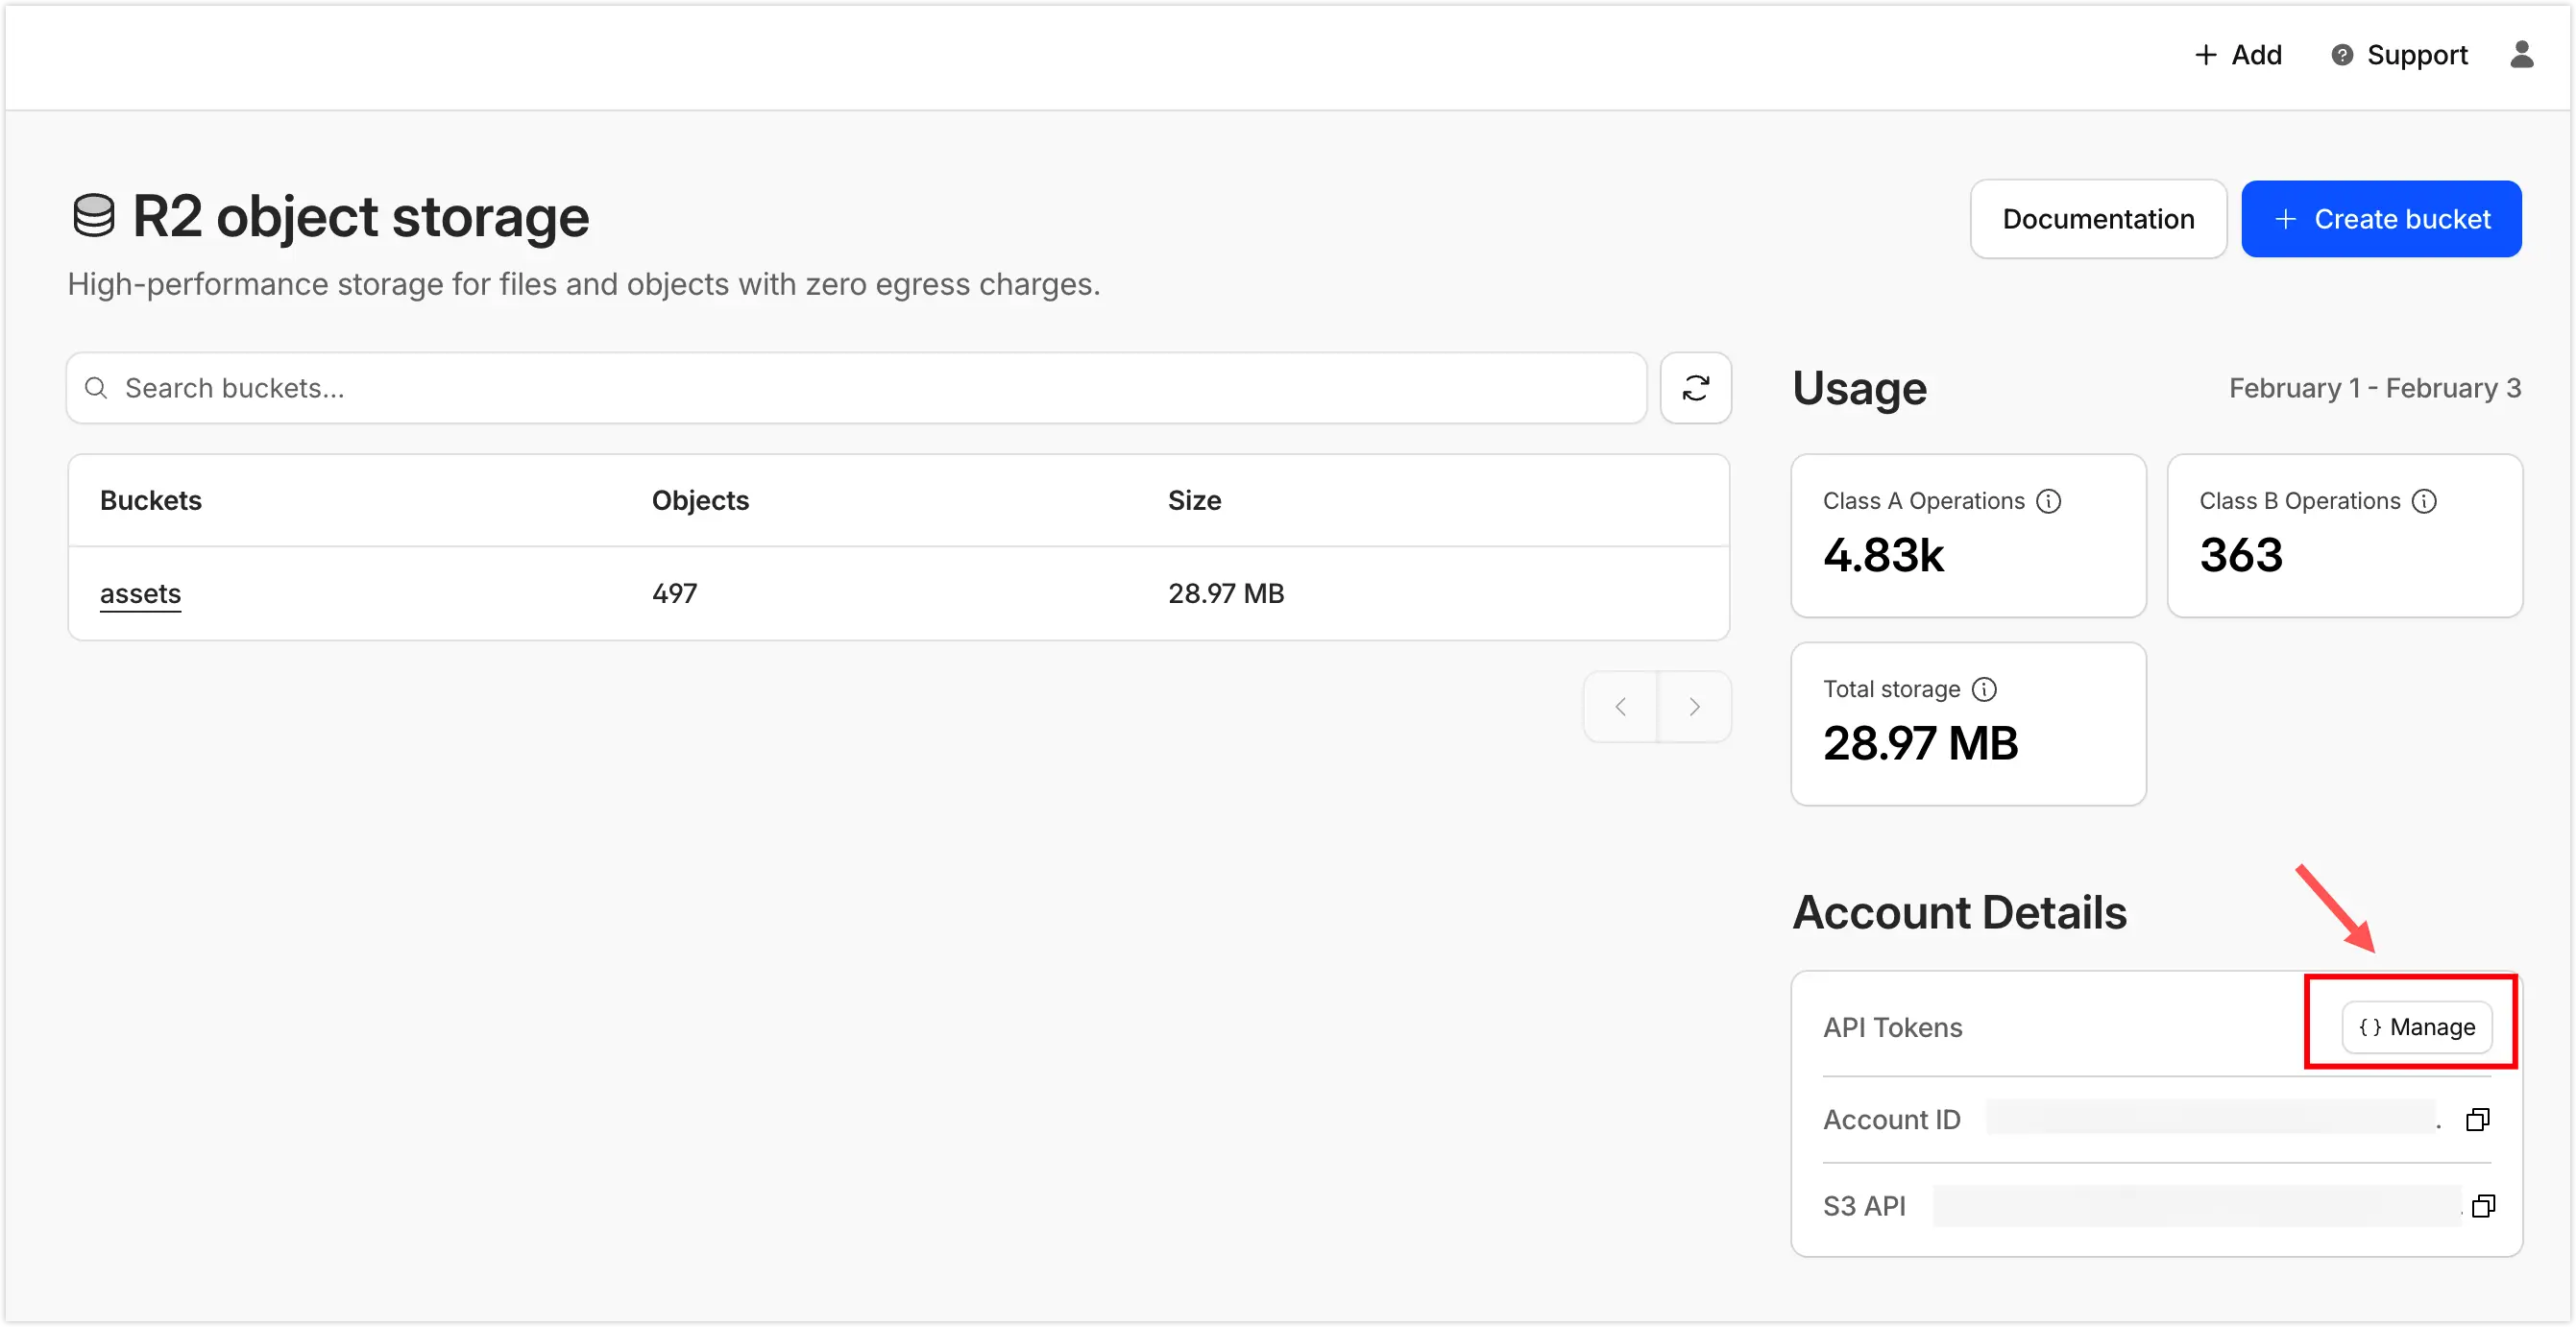
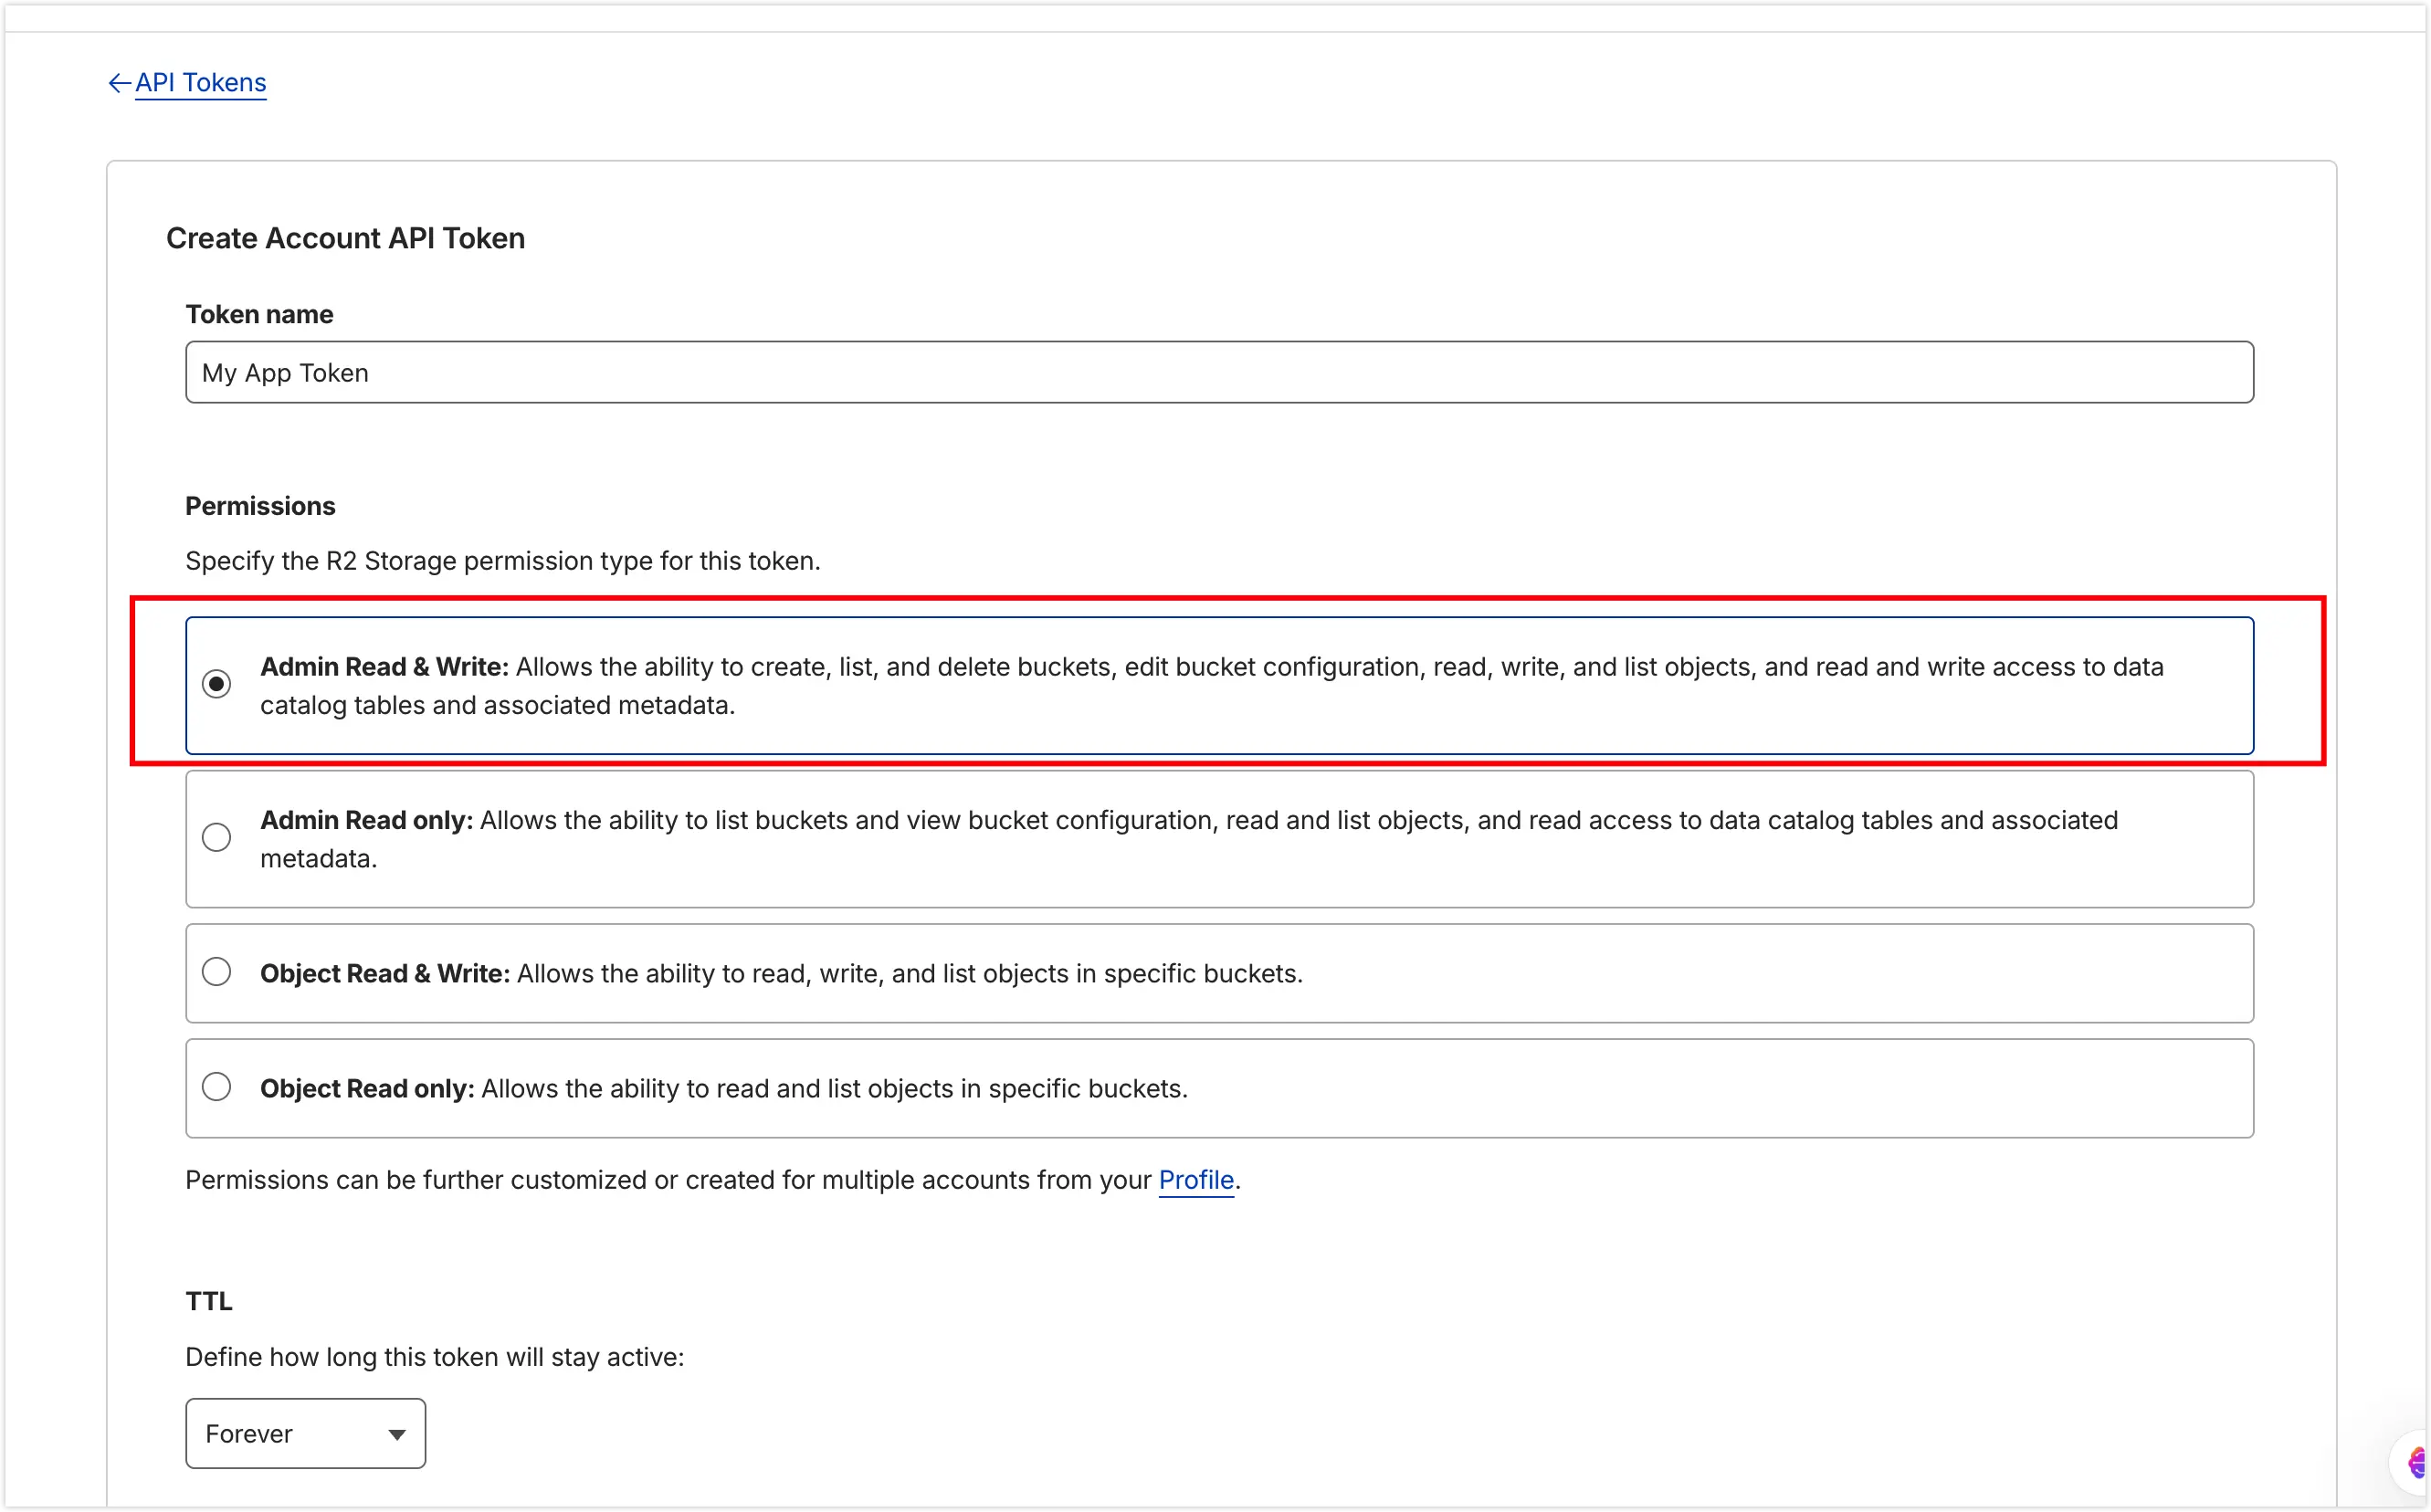
In the Cloudflare R2 dashboard, create a new Account API Token. Ensure the permissions are set to Admin Read & Write.
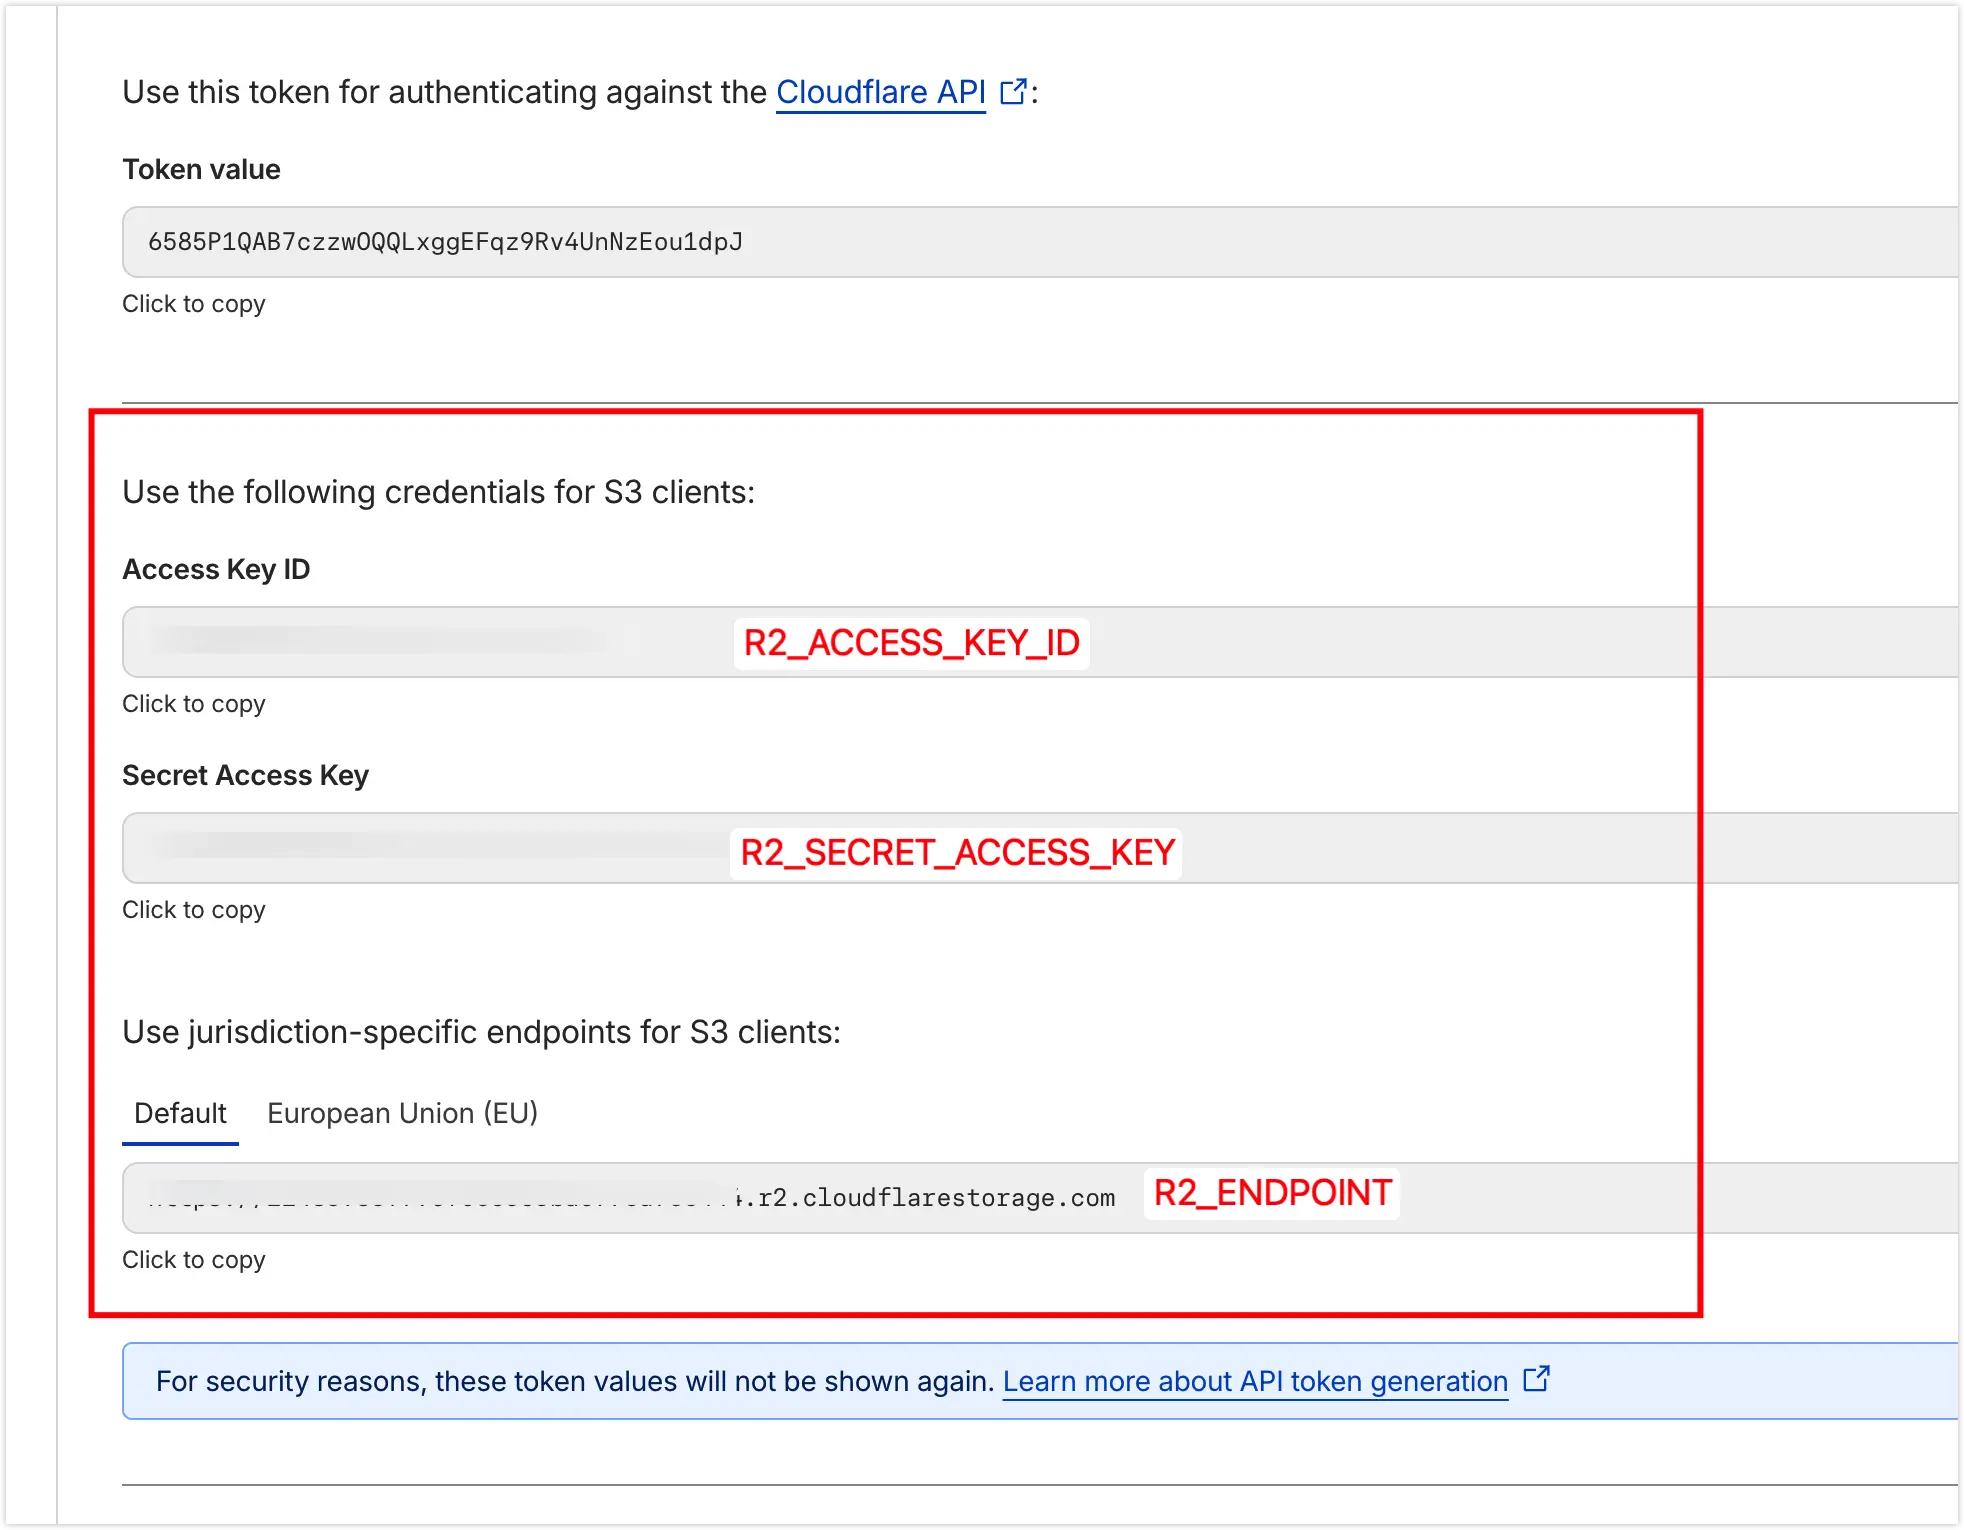
Copy the generated Access Key ID, Secret Access Key, and Endpoint into GitHub Secrets as: R2_ACCESS_KEY_ID, R2_SECRET_ACCESS_KEY, and R2_ENDPOINT.
4.2 Set up Vercel Secrets
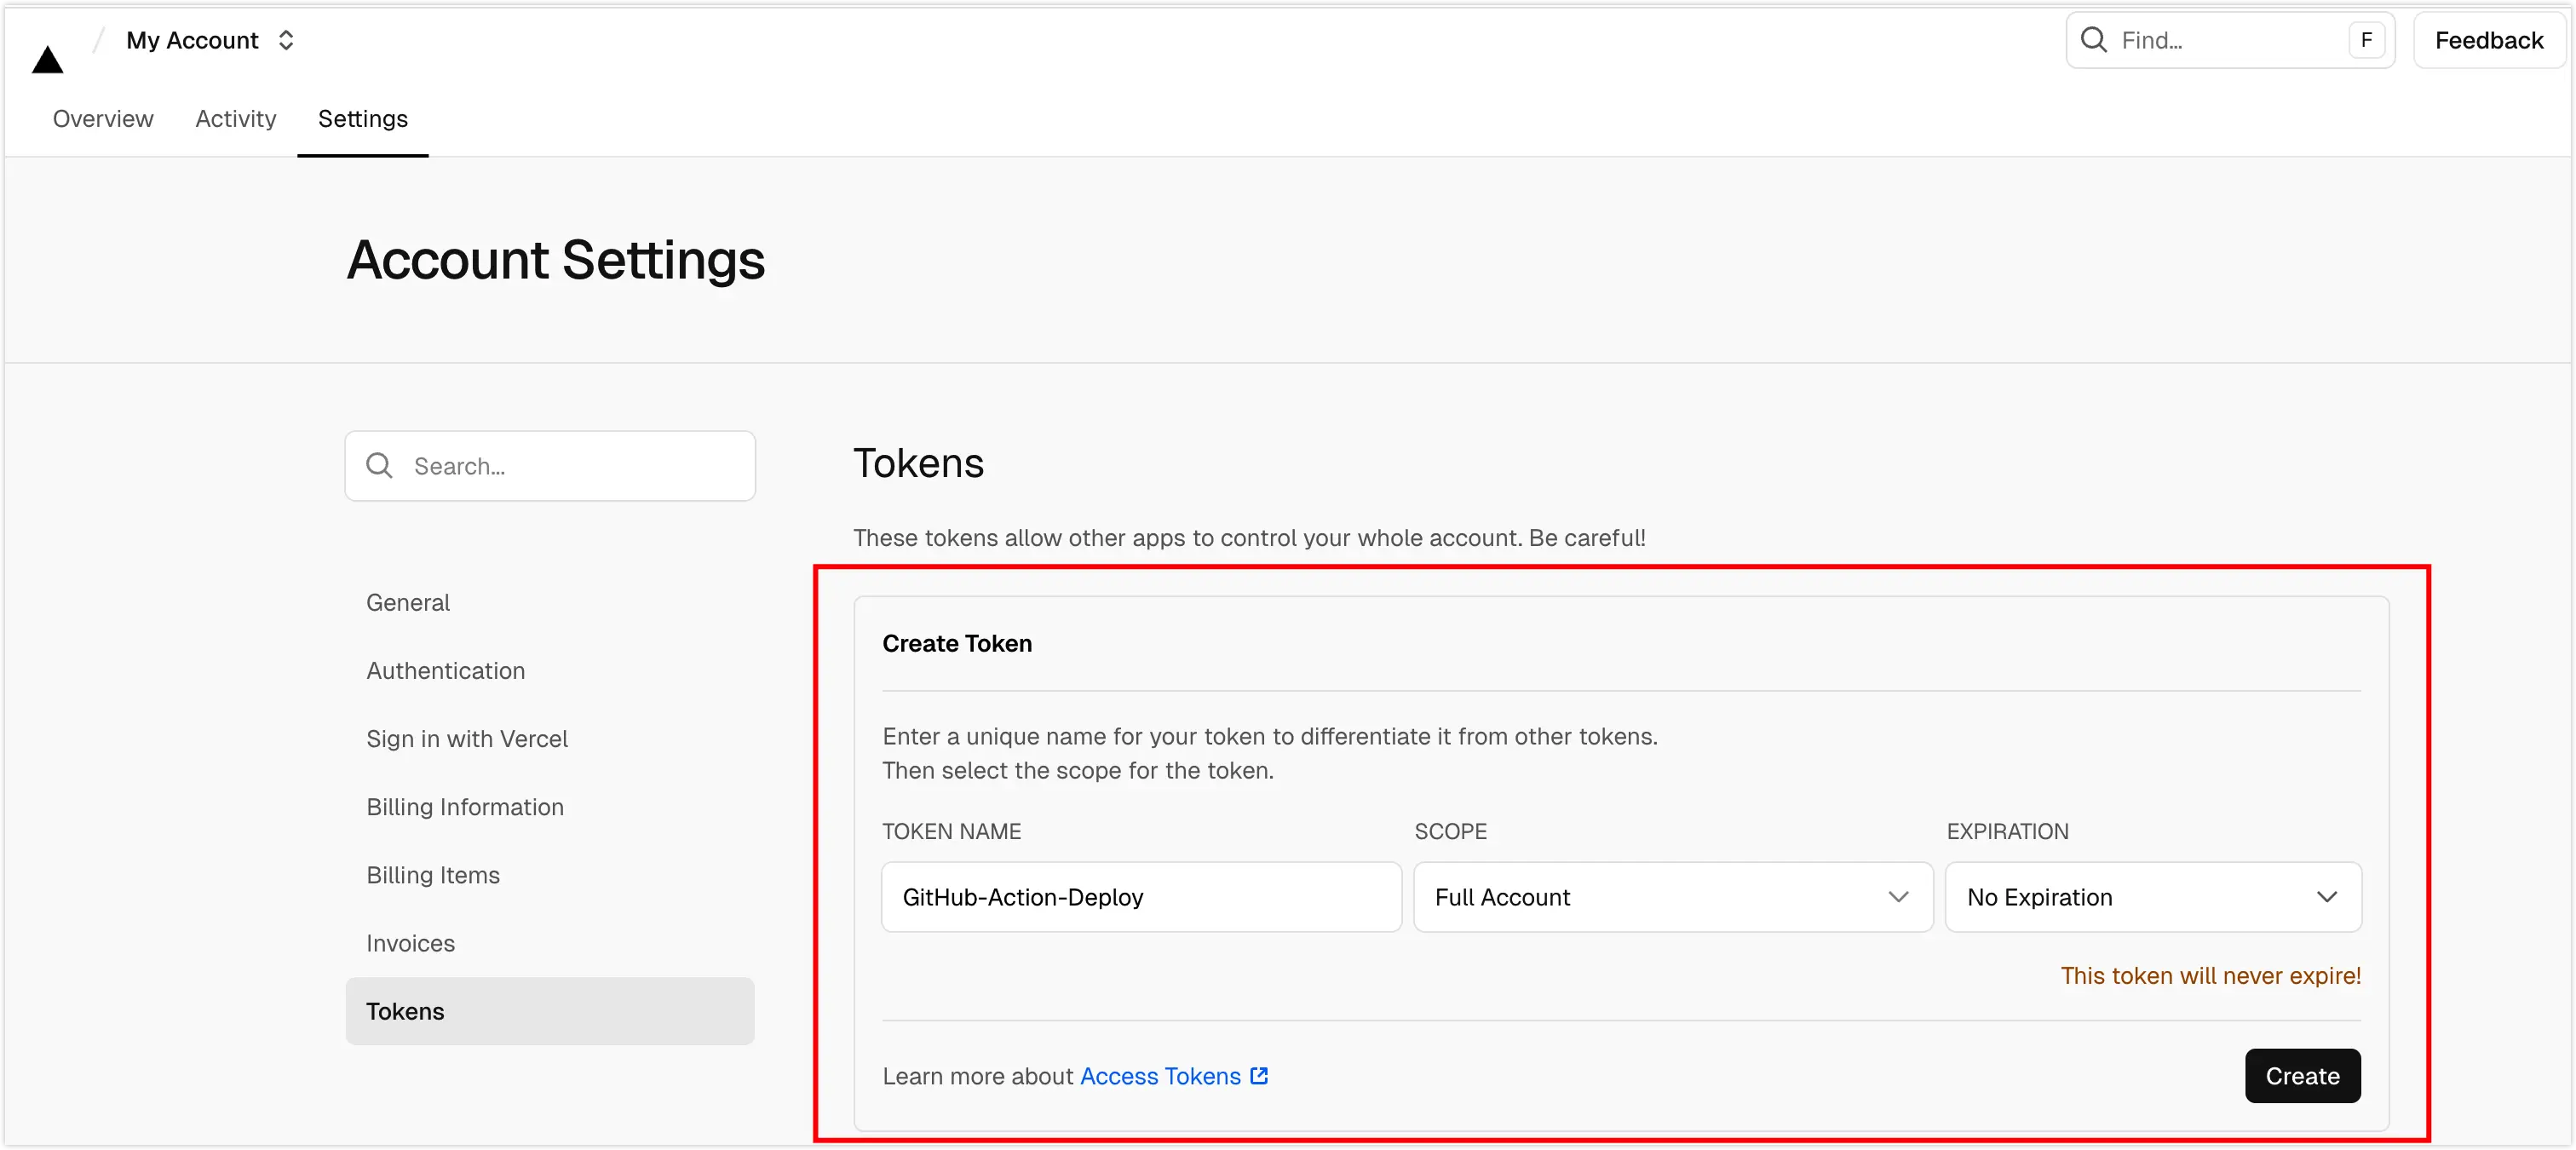
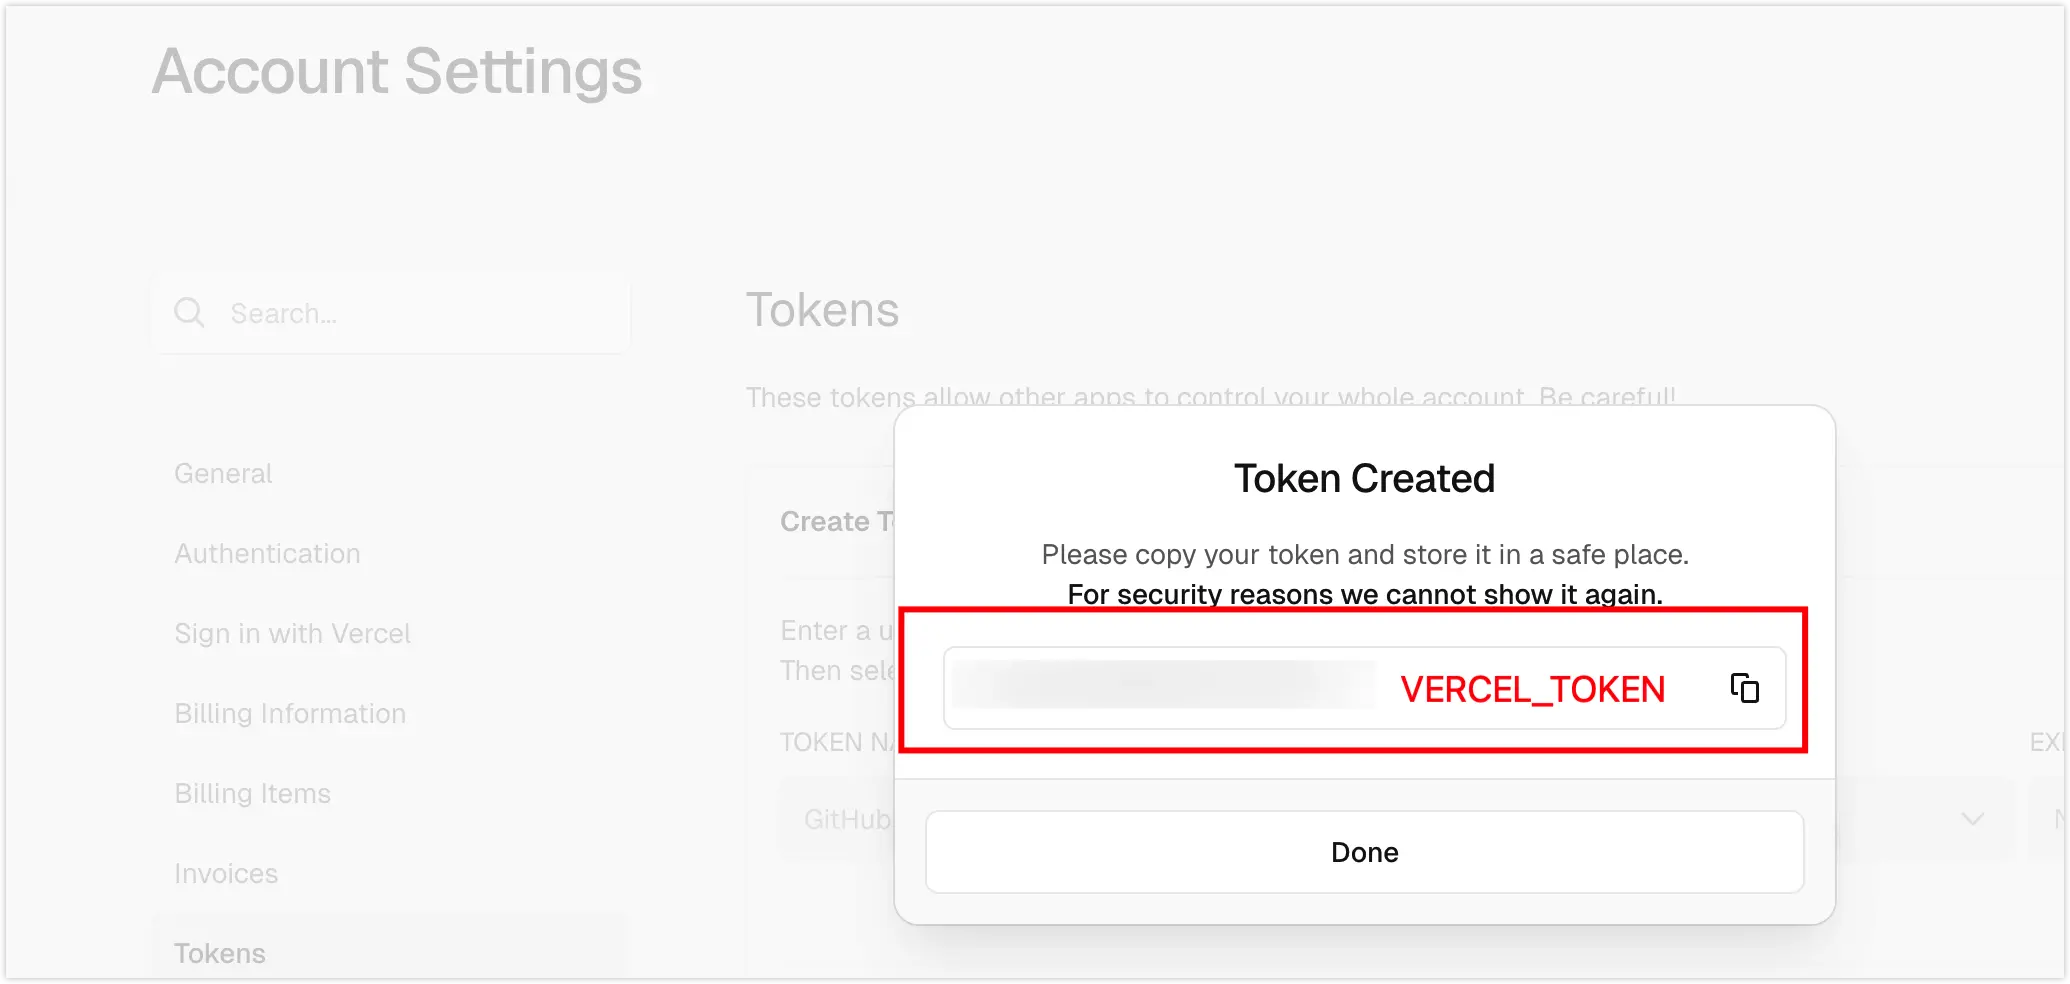
Get VERCEL_TOKEN
Generate a new token in your Vercel Account Settings > Tokens.
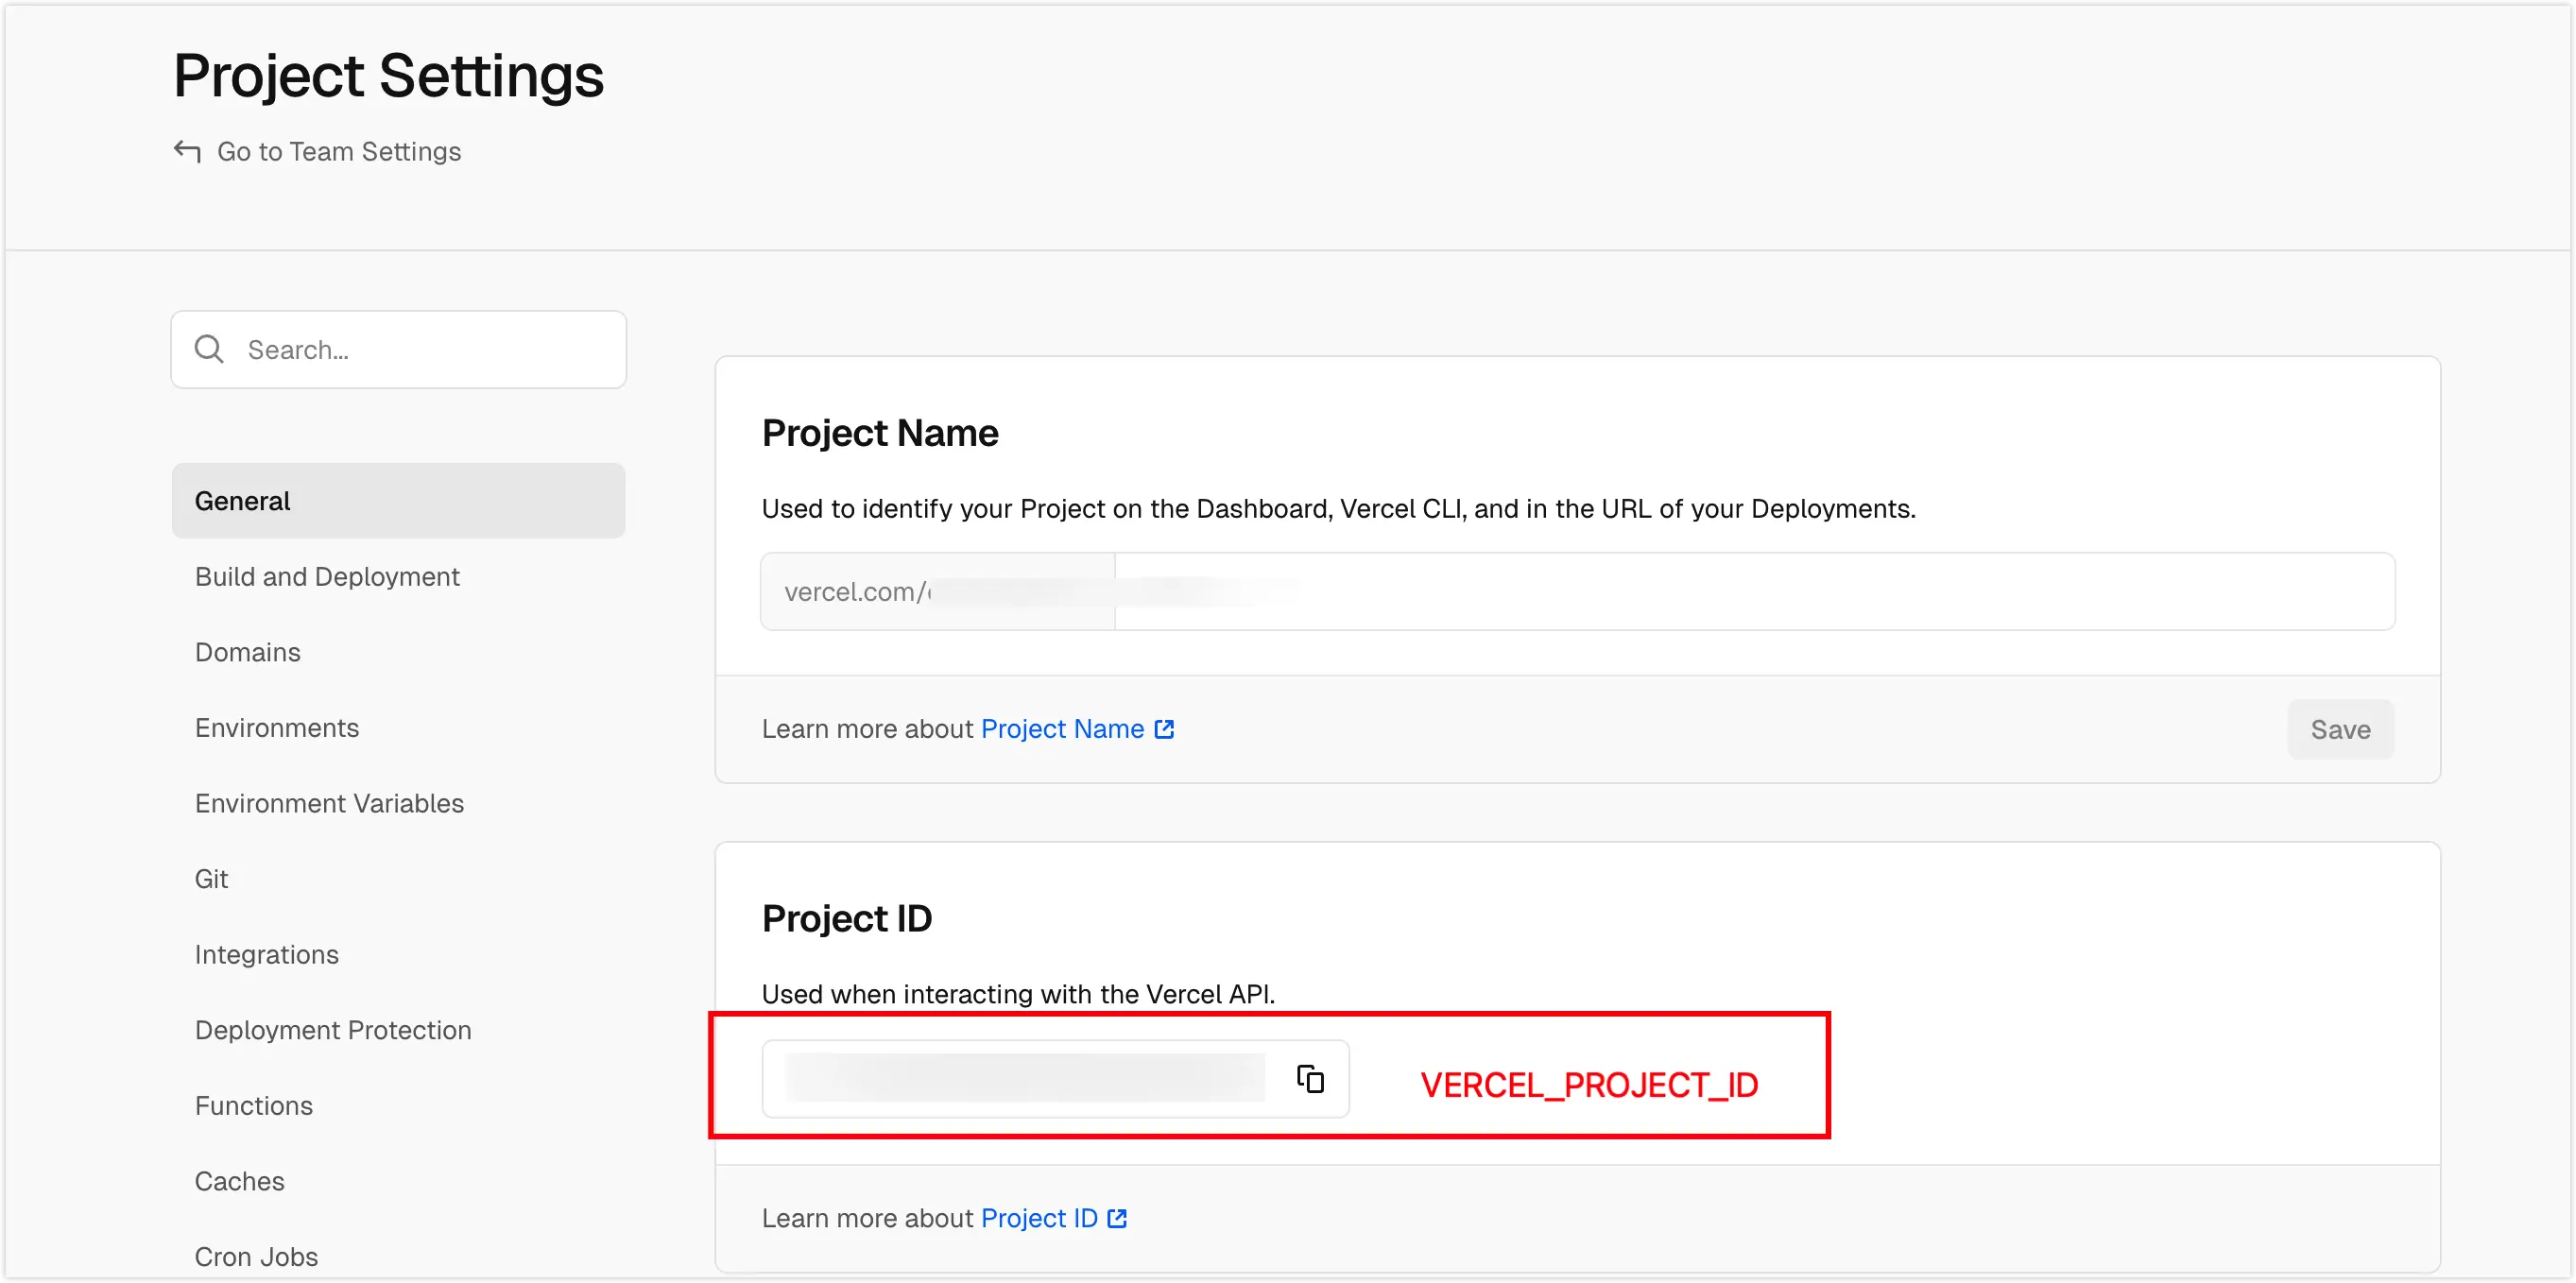
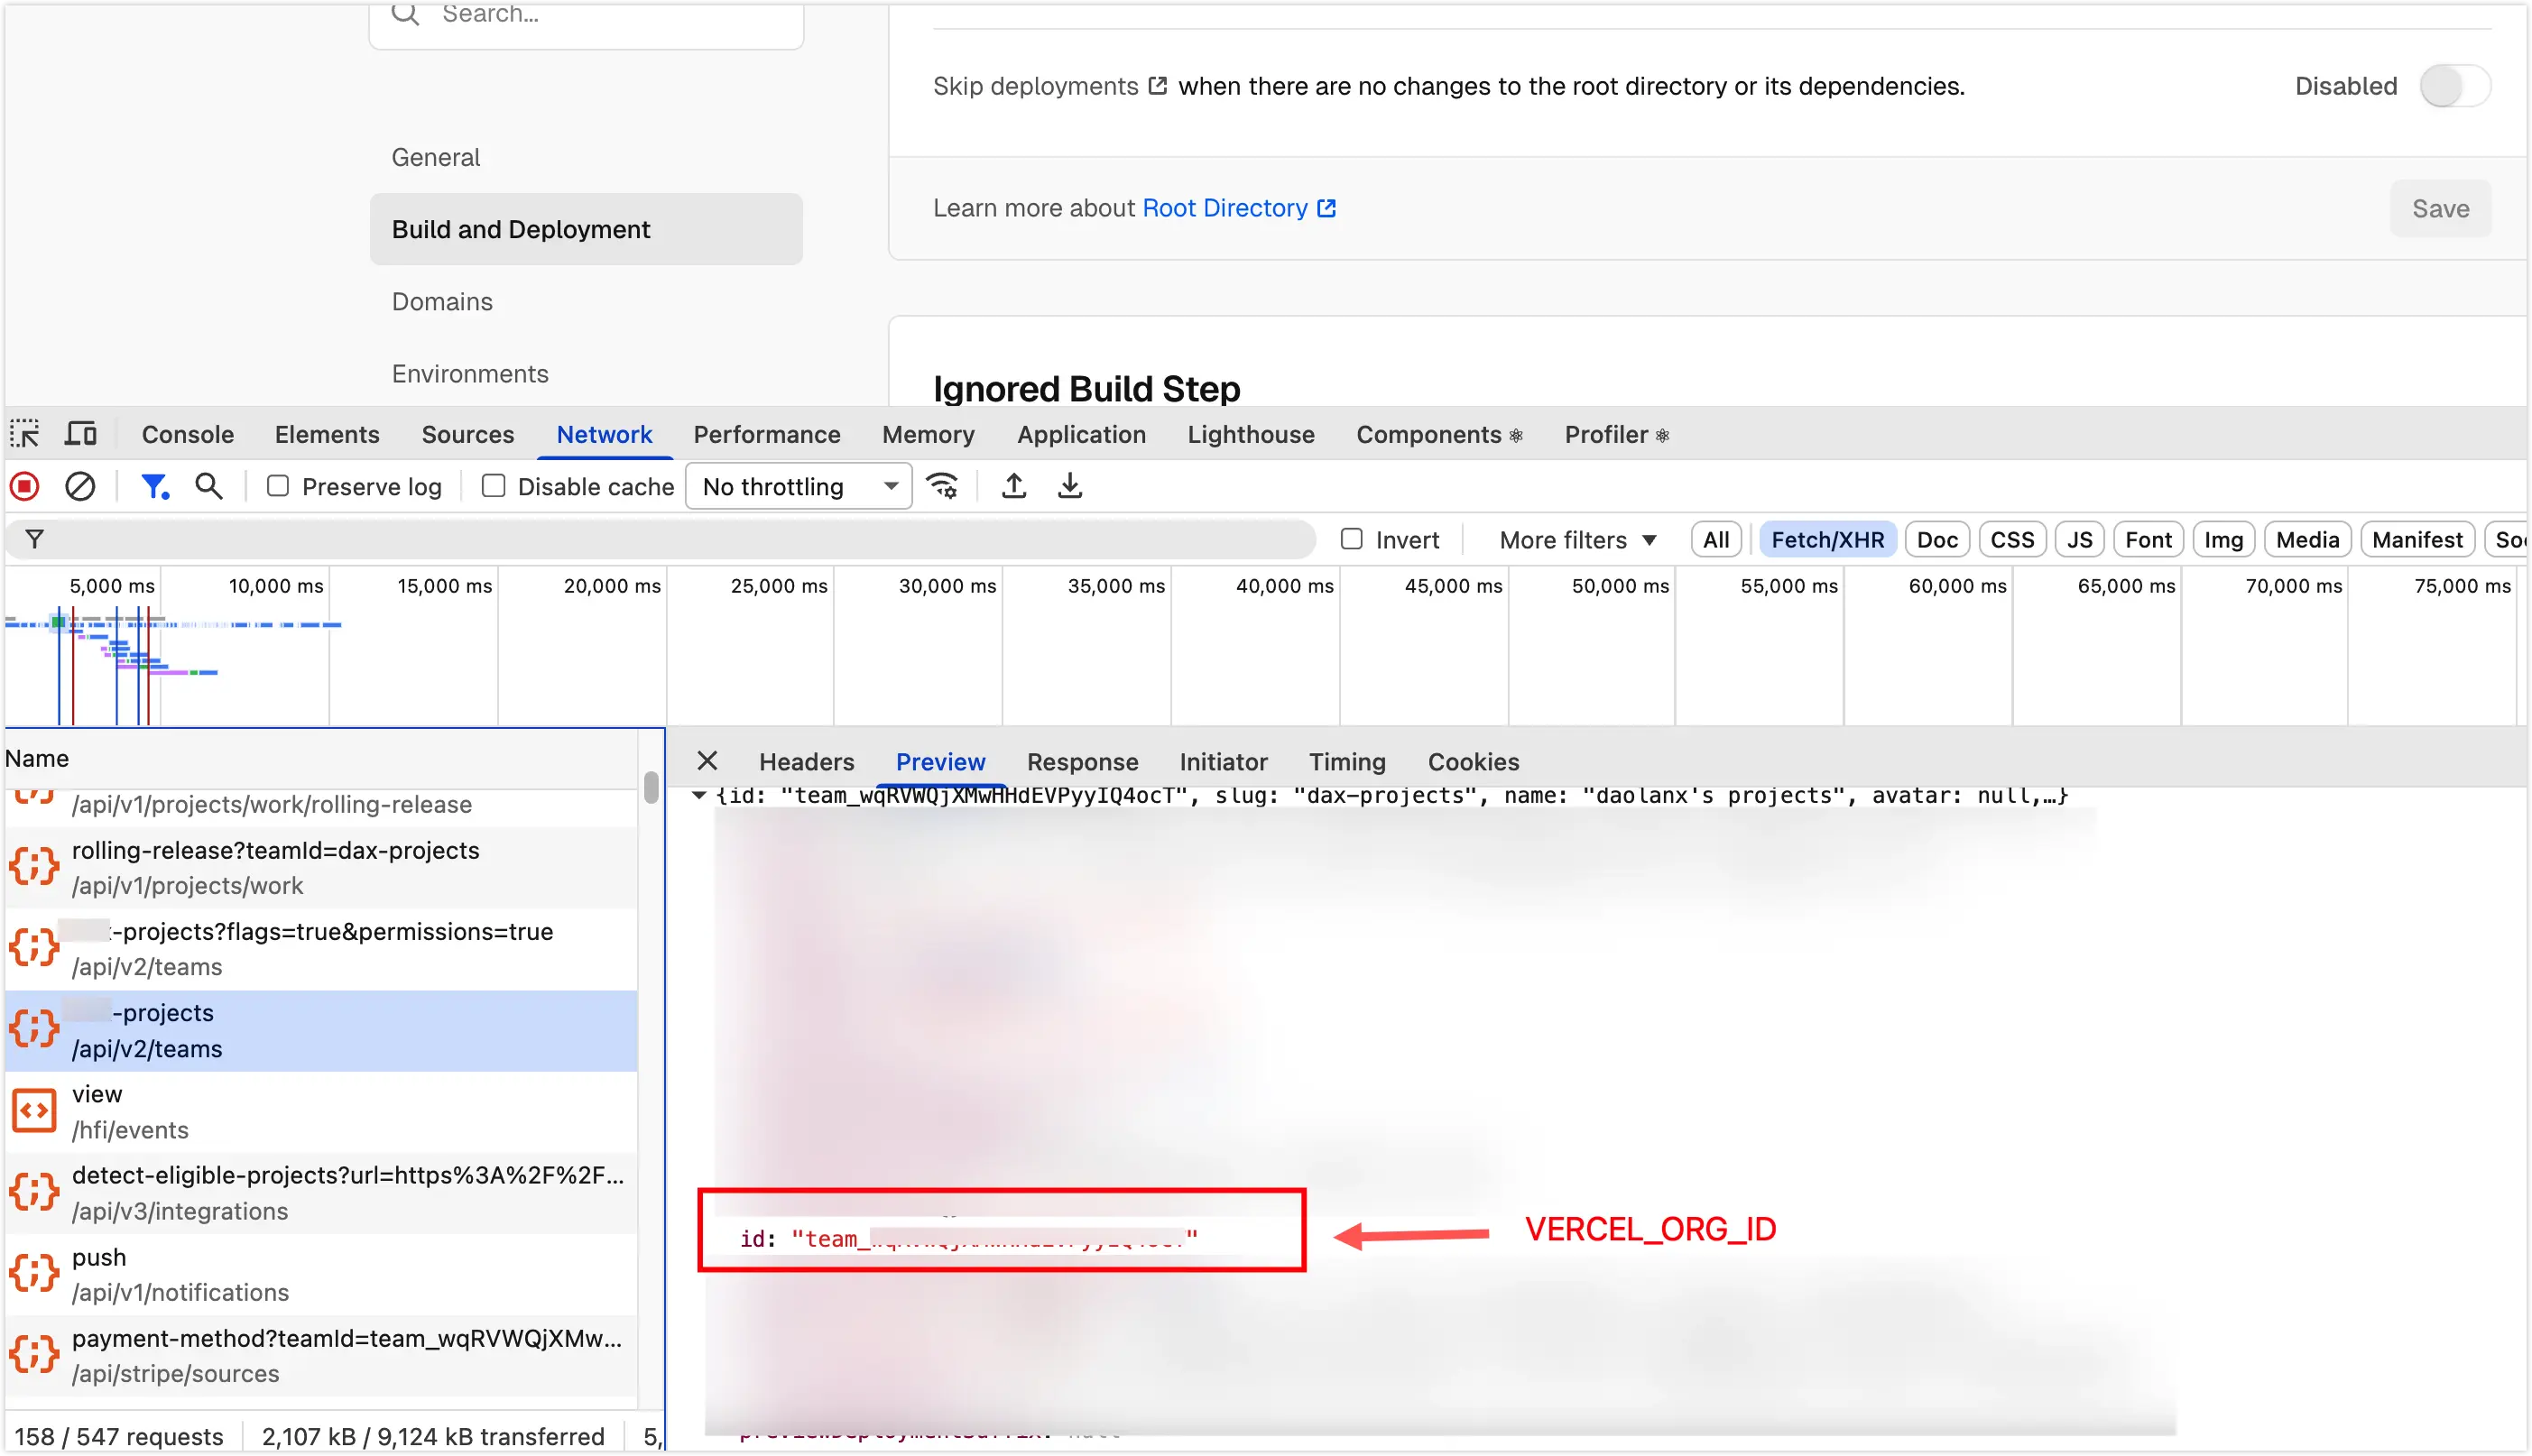
Get VERCEL_PROJECT_ID and VERCEL_ORG_ID
VERCEL_PROJECT_ID: Found directly in project Settings > General.
VERCEL_ORG_ID: Can be found in the project dashboard network requests or by checking the .vercel/project.json file generated after running vercel link locally.
5.Write the GitHub Workflow
Create a new file at .github/workflows/deploy-prod.yml in your root directory.
name: Deploy Production
on: push: branches: - main
env: VERCEL_ORG_ID: ${{ secrets.VERCEL_ORG_ID }} VERCEL_PROJECT_ID: ${{ secrets.VERCEL_PROJECT_ID }} VERCEL_TOKEN: ${{ secrets.VERCEL_TOKEN }}
jobs: deploy: name: Build, Sync and Deploy runs-on: ubuntu-latest steps: - name: Checkout code uses: actions/checkout@v4
# 1. Environment Setup - name: Setup pnpm uses: pnpm/action-setup@v4 with: version: 10
- name: Setup Node.js uses: actions/setup-node@v4 with: node-version: '20' cache: 'pnpm'
- name: Install dependencies run: pnpm install --frozen-lockfile
# 2. Vercel Build Phase (Build Once) - name: Pull and Build Vercel Artifacts run: | pnpx vercel pull --yes --environment=production --token=$VERCEL_TOKEN pnpx vercel build --prod --token=$VERCEL_TOKEN
# 3. Sync Static Assets to Cloudflare R2 - name: Upload Static Assets to R2 uses: jakejarvis/s3-sync-action@master with: args: --follow-symlinks --delete env: SOURCE_DIR: '.vercel/output/static/' AWS_S3_BUCKET: 'assets' AWS_ACCESS_KEY_ID: ${{ secrets.R2_ACCESS_KEY_ID }} AWS_SECRET_ACCESS_KEY: ${{ secrets.R2_SECRET_ACCESS_KEY }} AWS_REGION: 'auto' AWS_S3_ENDPOINT: ${{ secrets.R2_ENDPOINT }}
# 4. Final Deployment (Deploy Prebuilt) - name: Deploy to Vercel run: pnpx vercel deploy --prebuilt --prod --token=$VERCEL_TOKEN
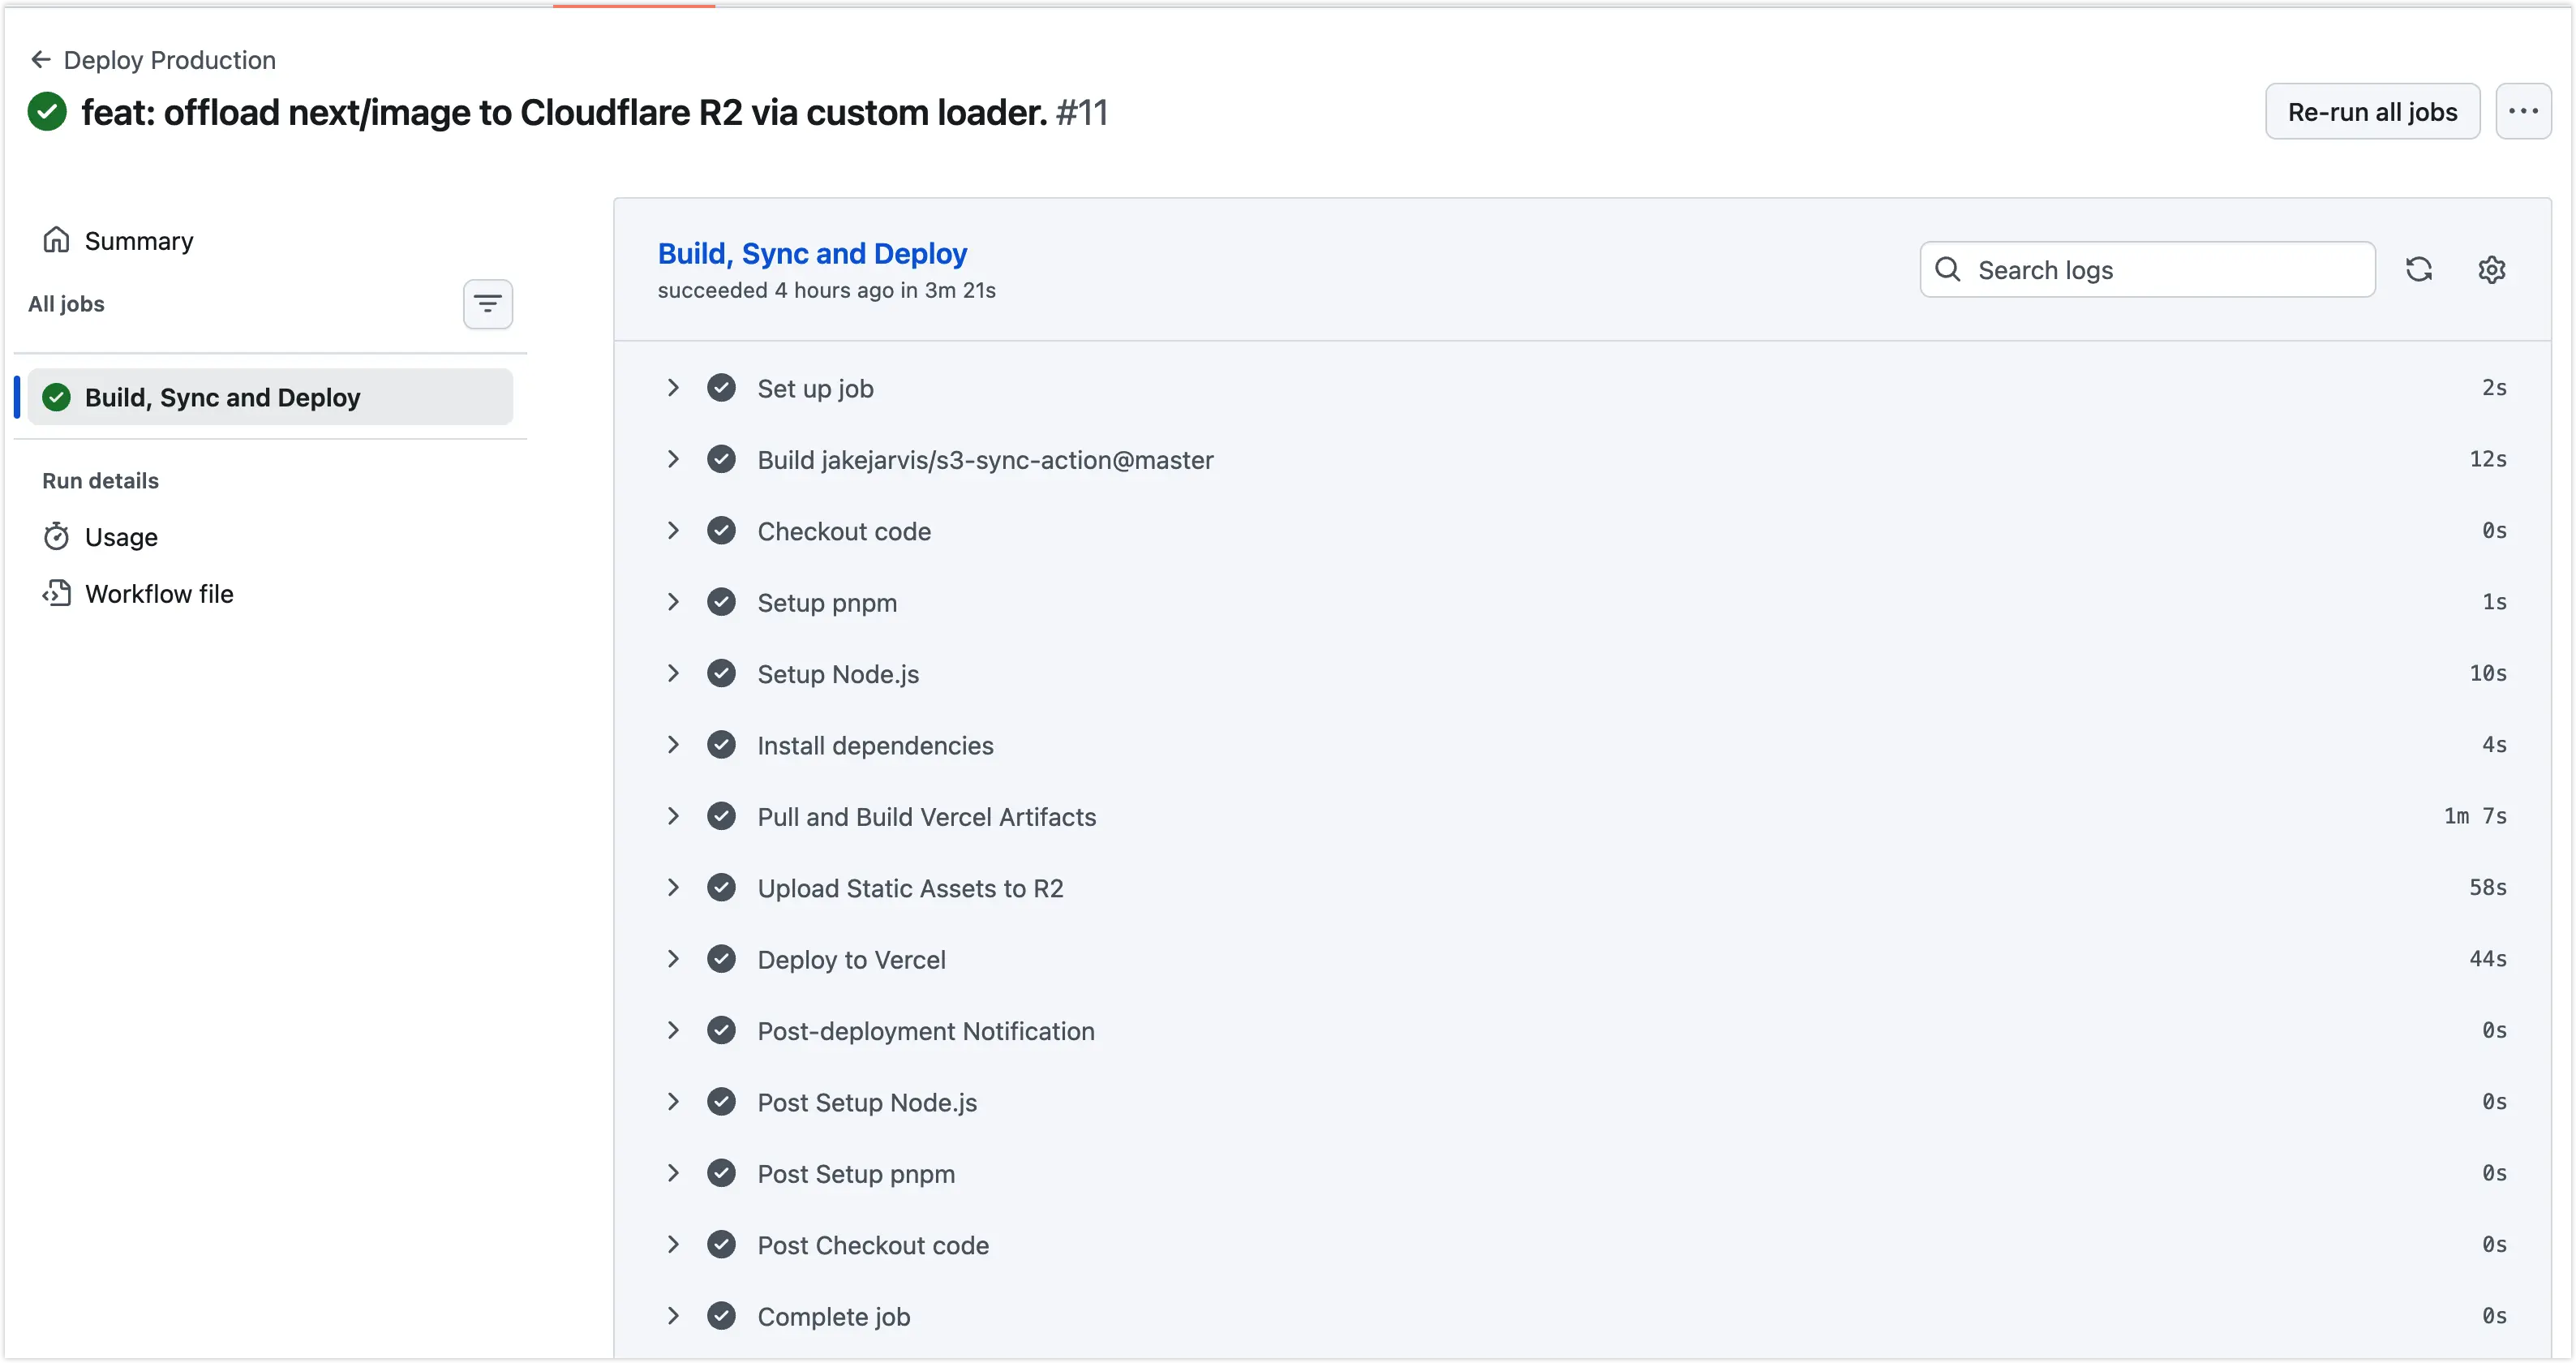
- name: Post-deployment Notification if: success() run: echo "Successfully deployed to production and synced to R2."Once you push your code, the Workflow will trigger automatically. You can monitor the real-time progress under the Actions tab of your GitHub repository.
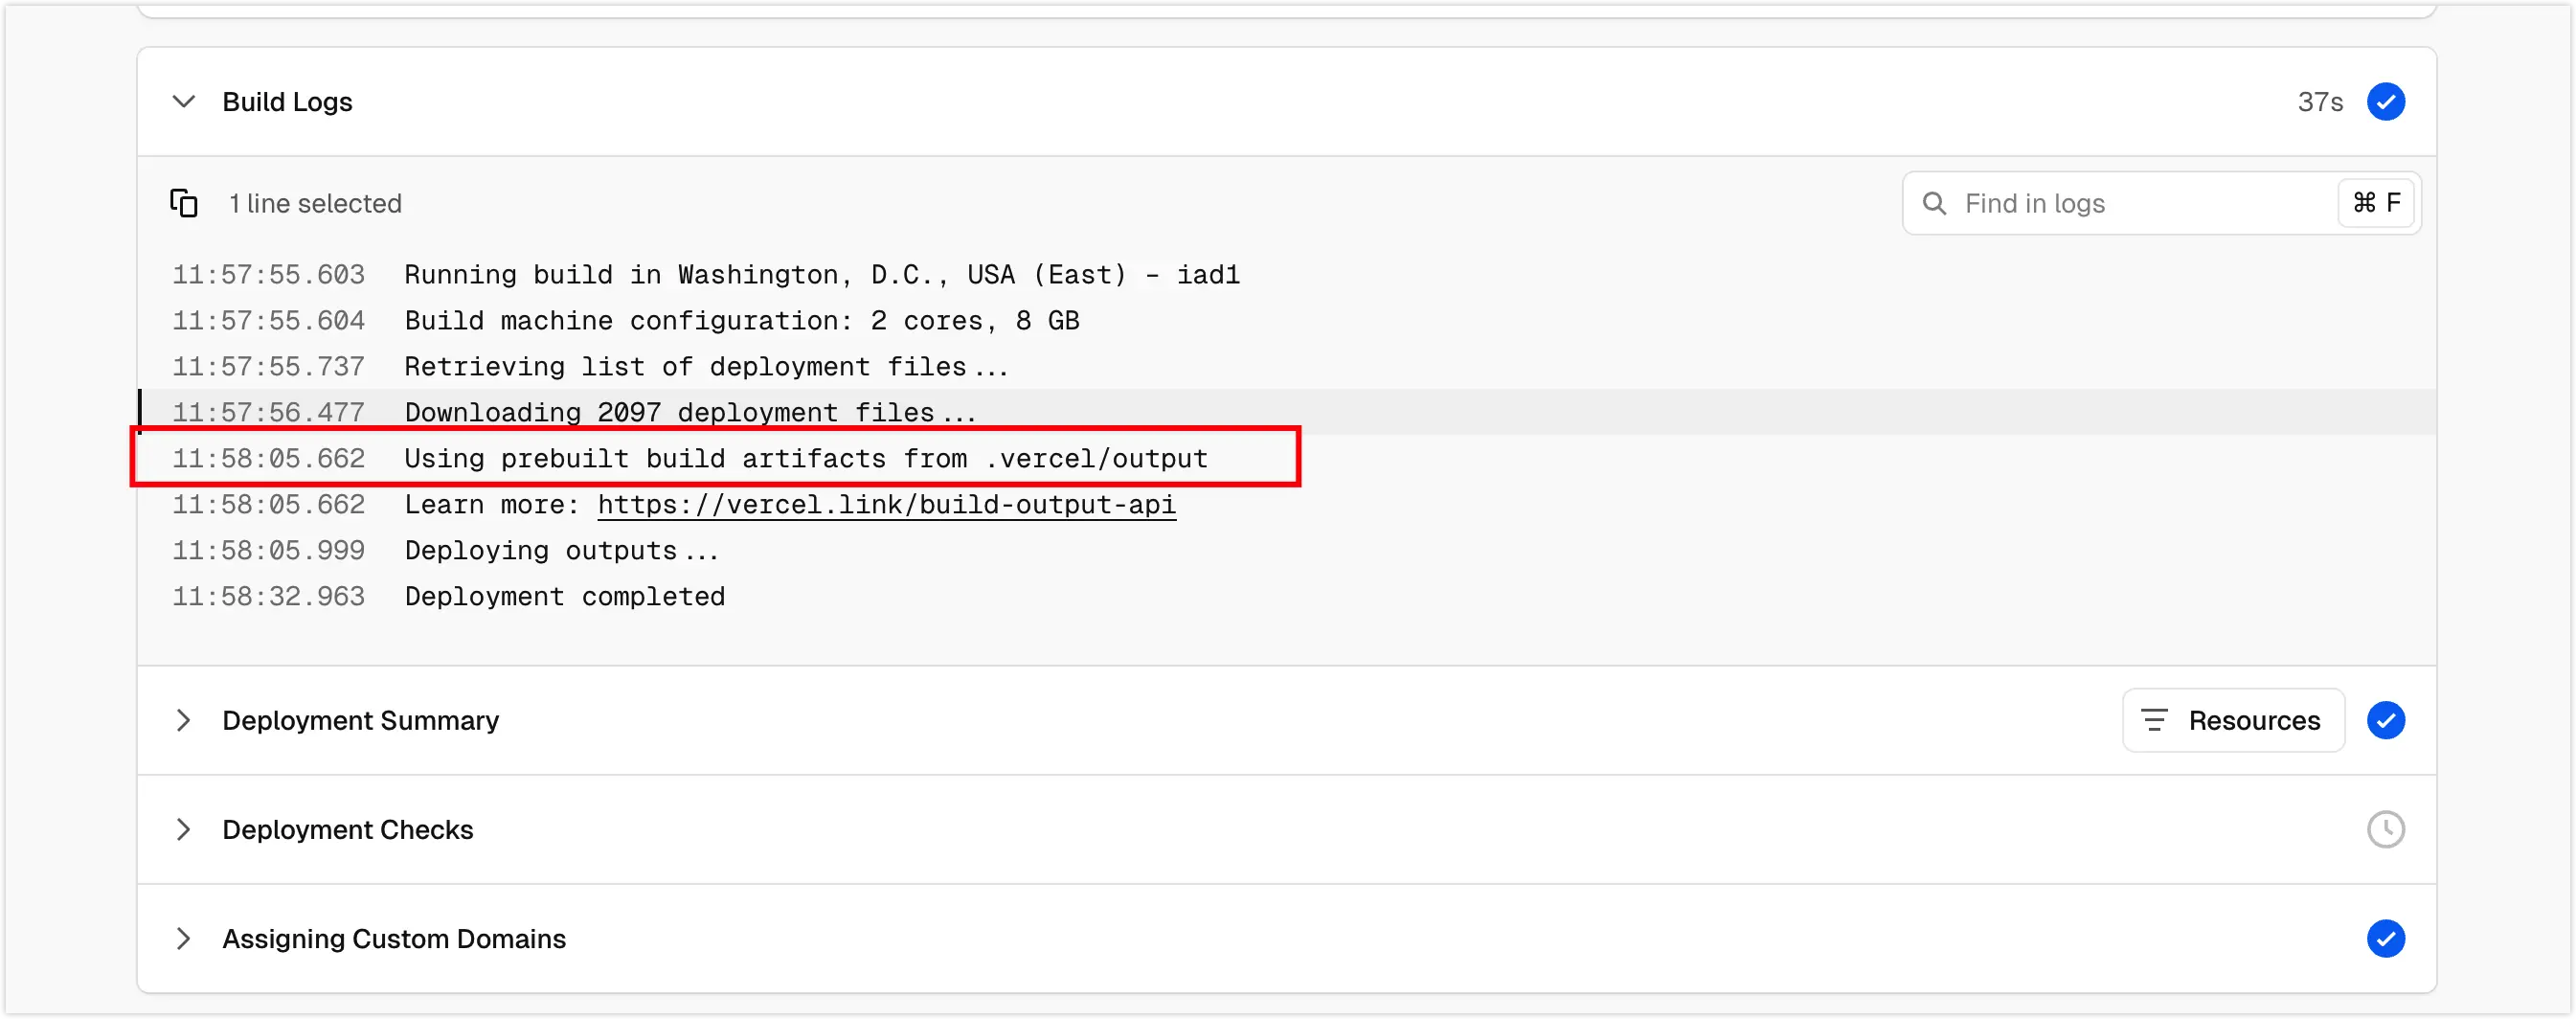
When the workflow reaches the Deploy to Vercel step, the Vercel console will show that it is using the prebuilt mode. This means Vercel is strictly handling the final distribution, while the heavy lifting and asset hosting are handled by GitHub and Cloudflare respectively.

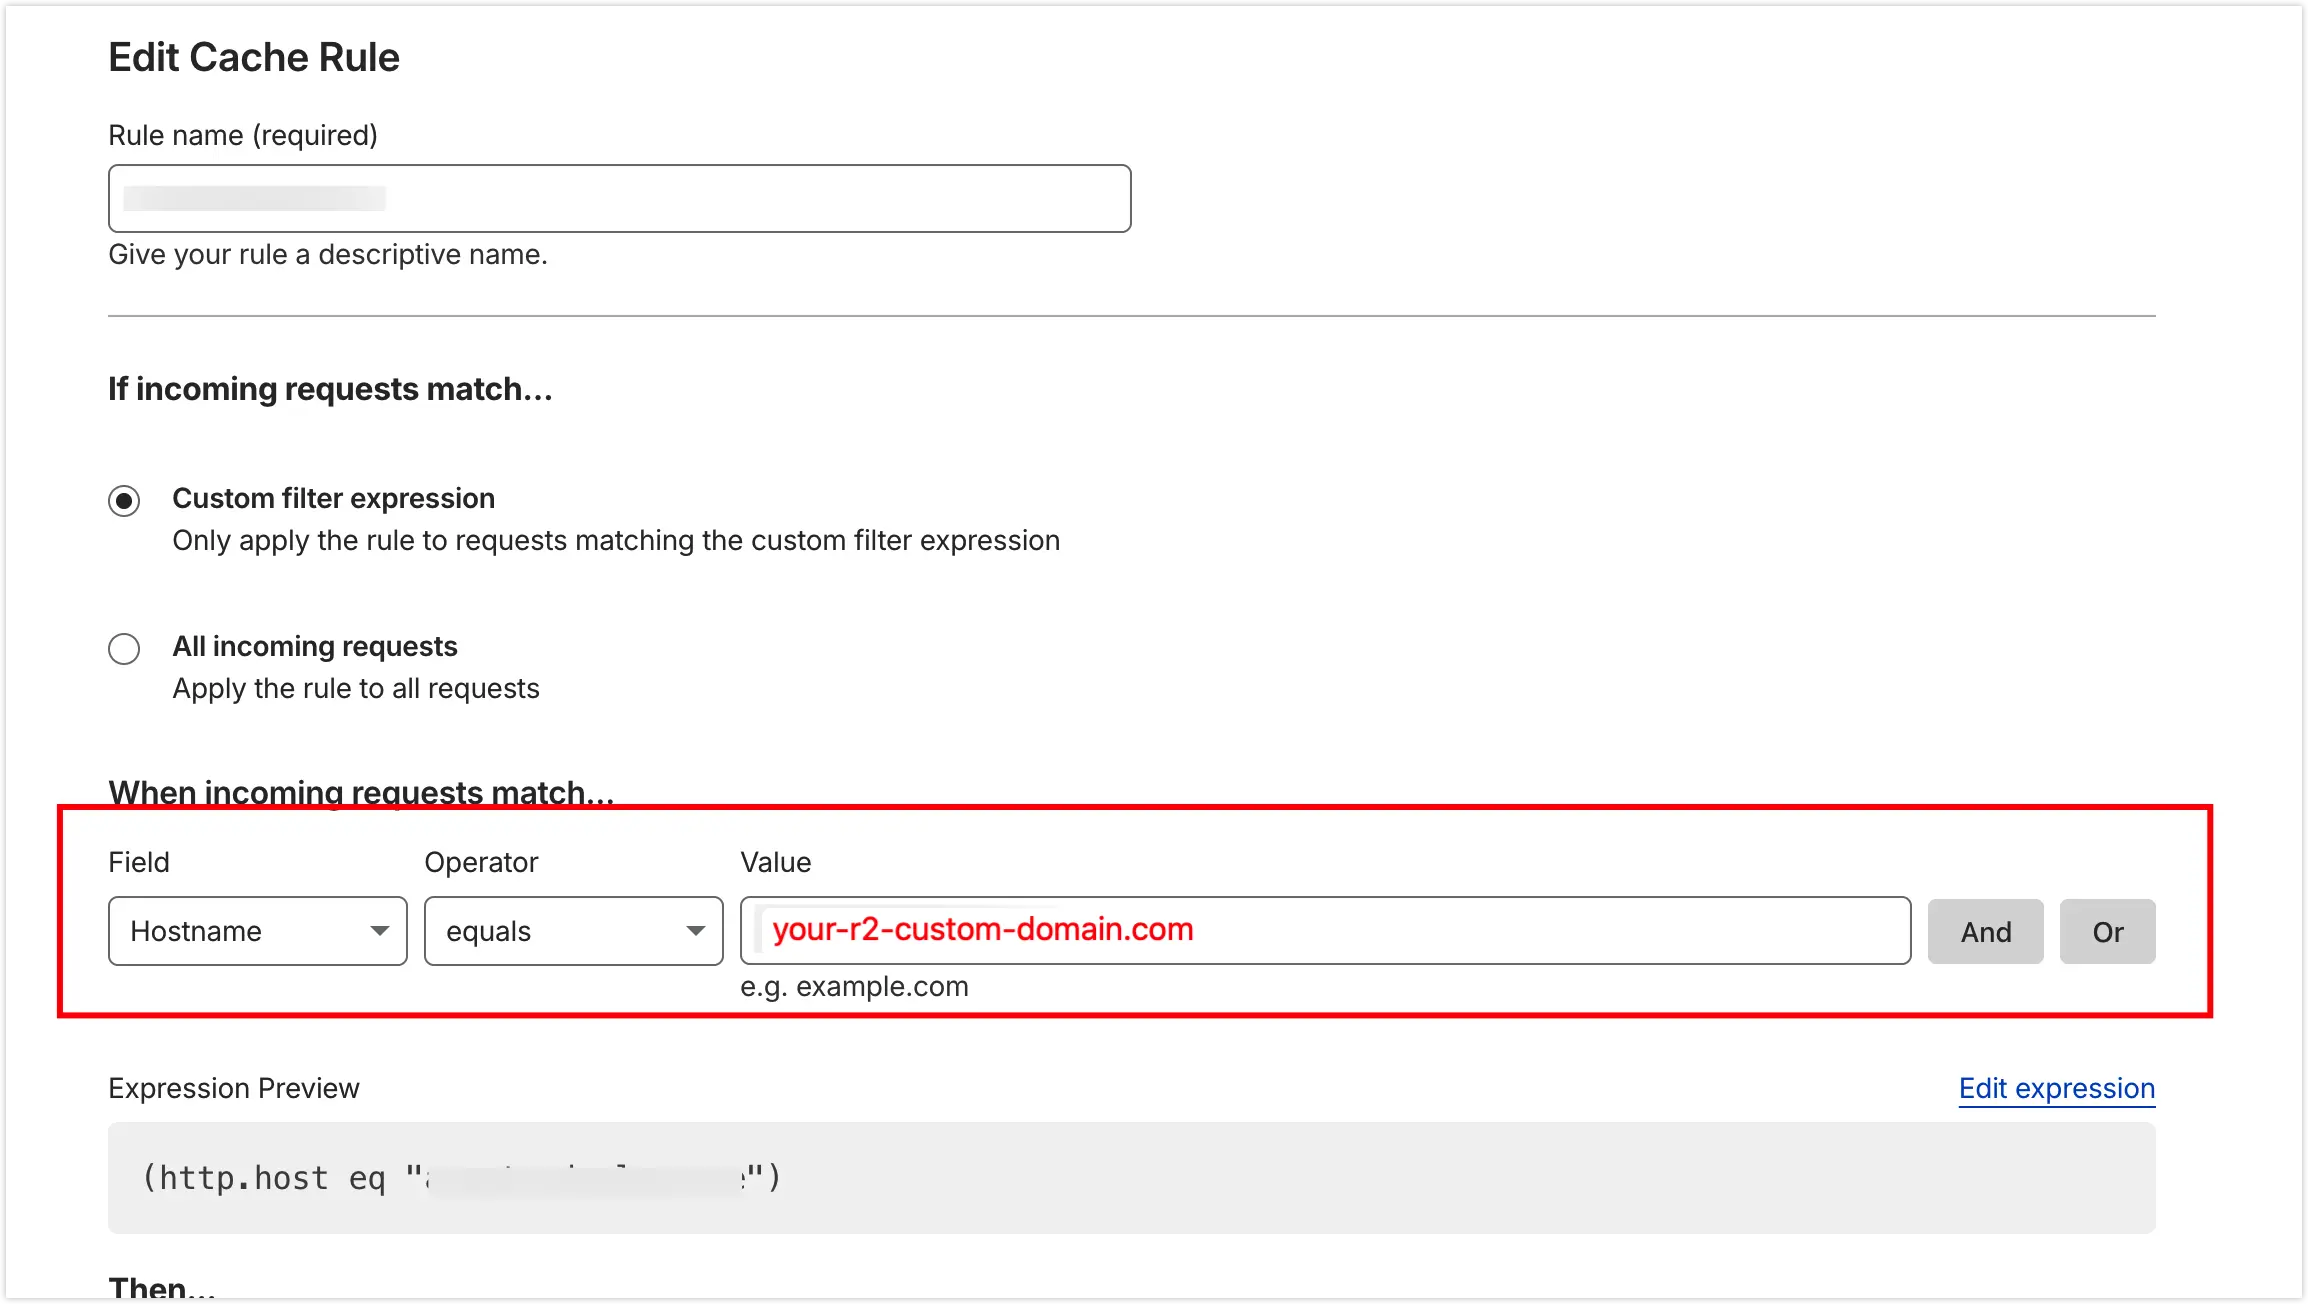
6. Configuring Cache Rules in Cloudflare
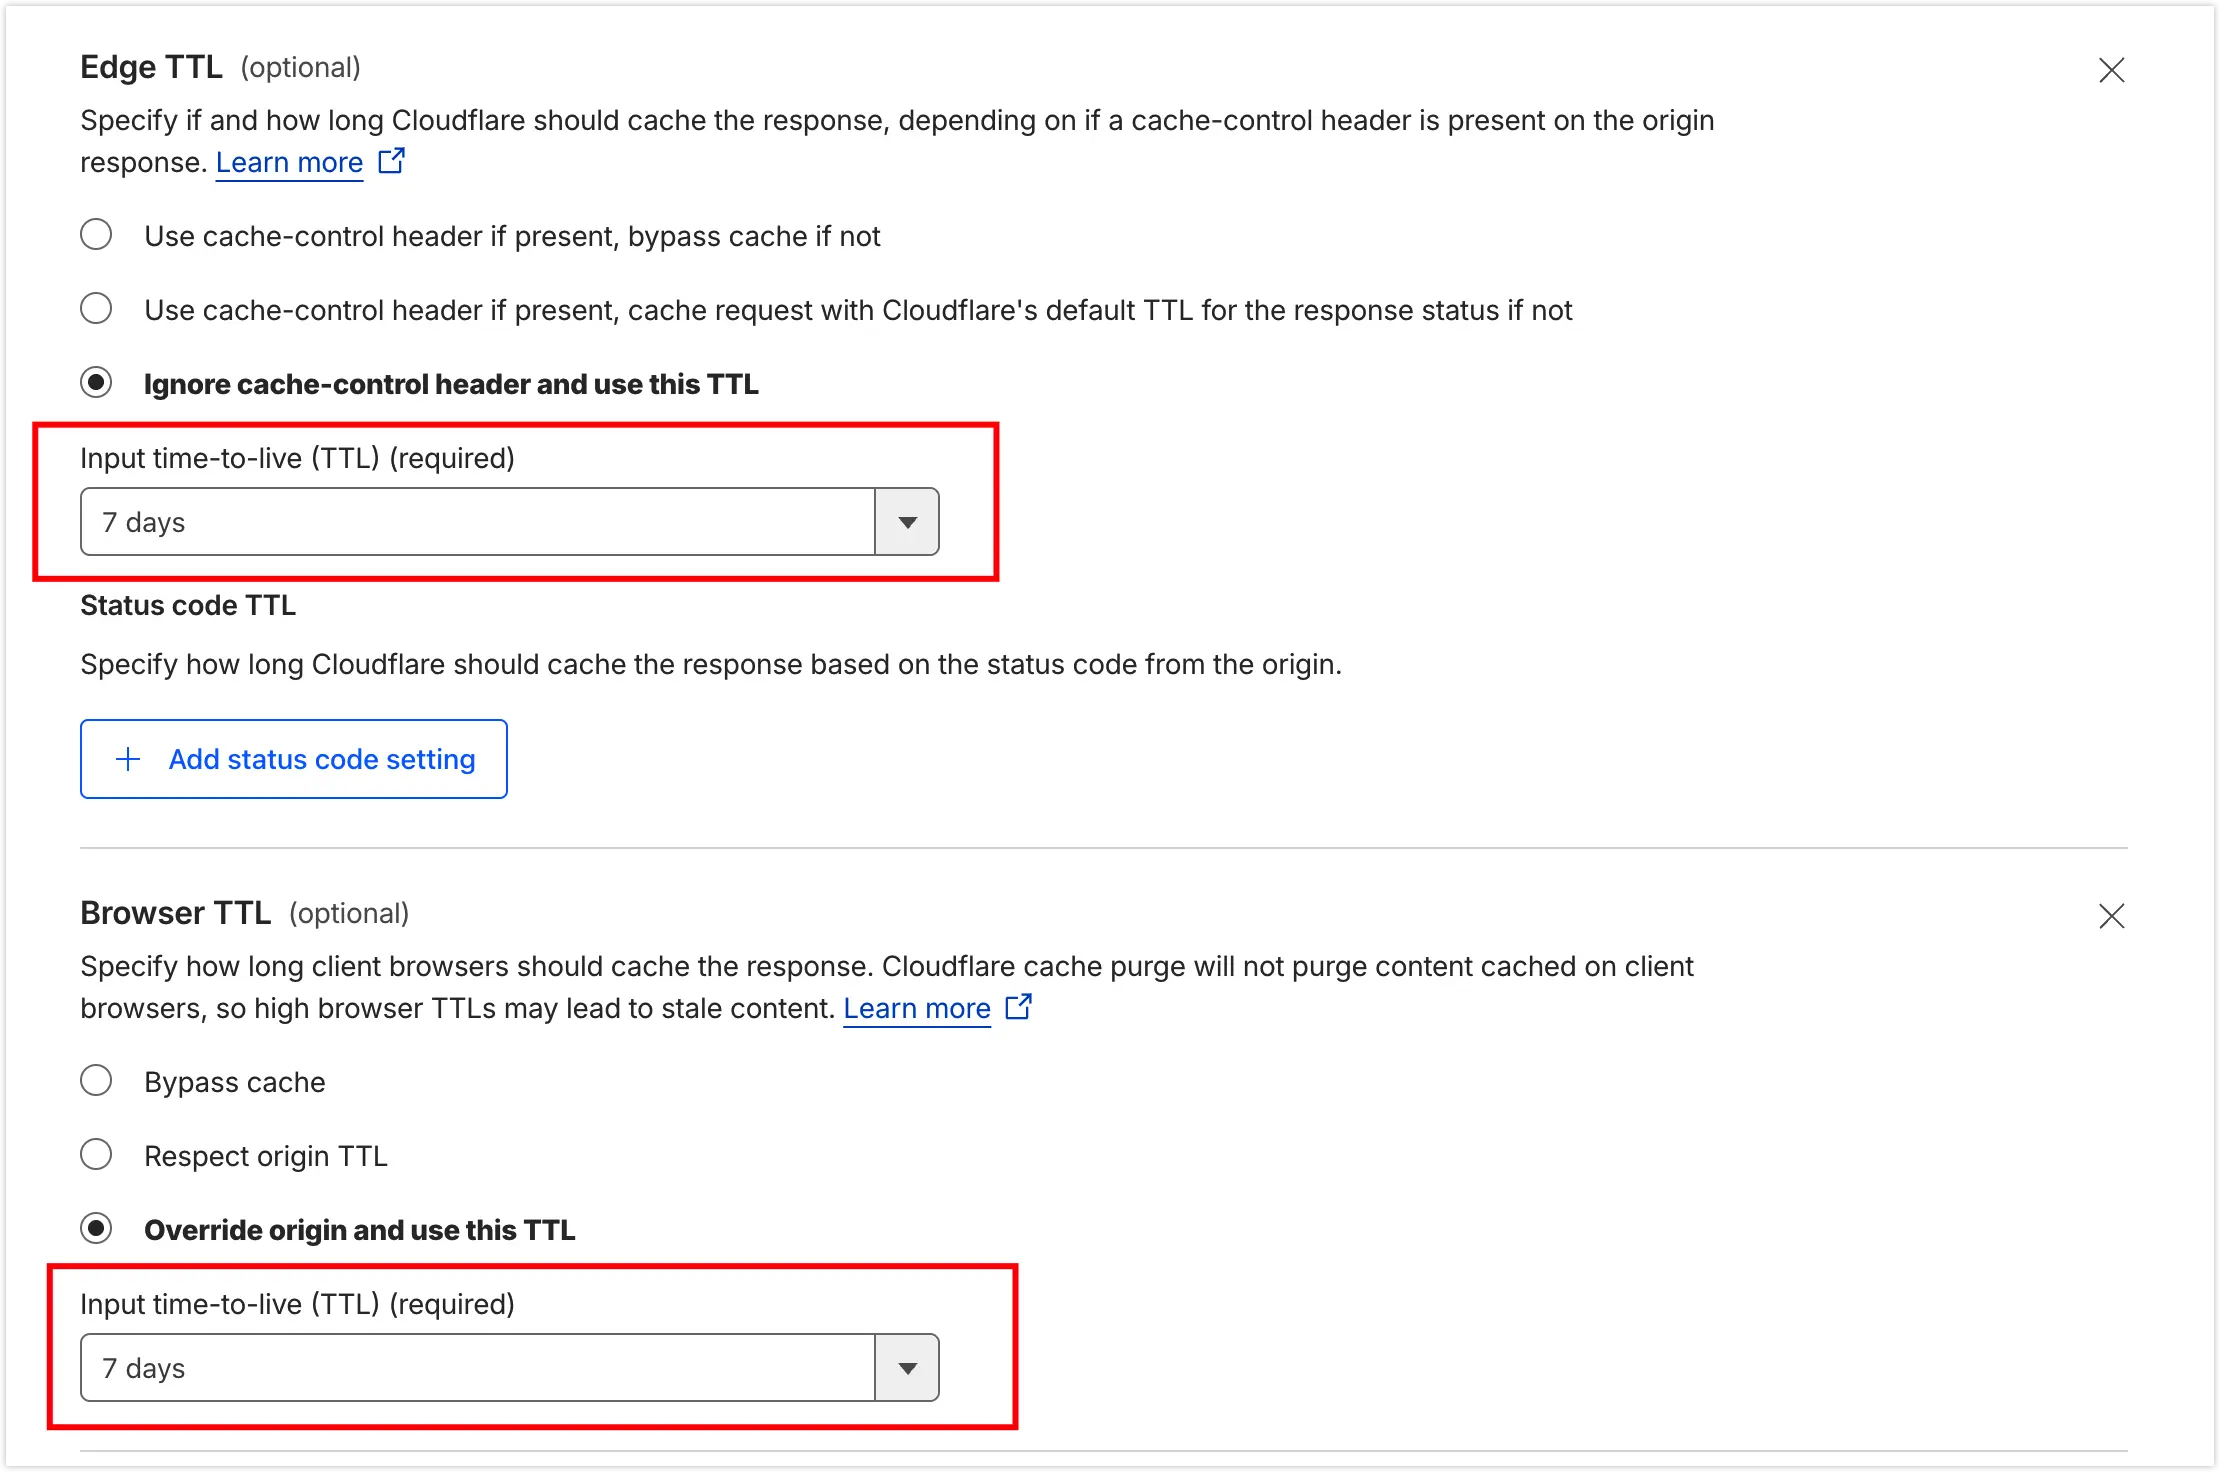
Configure Cache Rules for your R2-bound custom domain. You can manually set the Edge TTL and Browser TTL based on your specific needs.
Since Next.js static assets are hashed upon build and images rarely change, significantly extending the TTL can maximize Cloudflare’s cache hit ratio. By ensuring assets stay on the edge nodes as long as possible, you drastically reduce origin requests to R2, further lowering latency, improving access speed, and minimizing API invocation costs.